

We recommend Trust Wallet if you don't already have MetaMask or the Base app — it's the simplest option to set up from scratch and works well with QOIN on Base.
Trust Wallet
Before you start
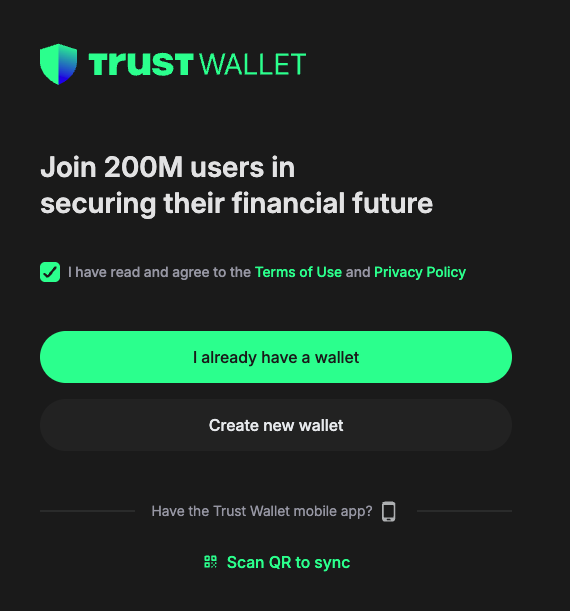
Tick the box to agree to the Terms of Use and Privacy Policy, then select "Create new wallet." (If you already have a wallet from the mobile app, choose "I already have a wallet" instead and either enter your Secret Phrase or scan a QR code to sync.)
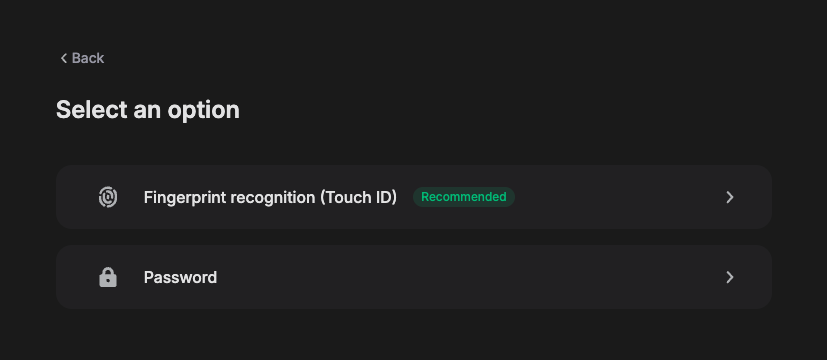
Select how you want to unlock Trust Wallet on this device: fingerprint recognition (Touch ID), if your device and browser support it, or a password. Fingerprint is marked "Recommended," but a password works everywhere and is required as a fallback either way.
Trust Wallet generates your unique 12-word Secret Phrase. Write the words down, in order, on paper and store them somewhere private and safe — not a screenshot, cloud drive, email, or note app. Select "Got it" and "Proceed," then confirm the phrase by selecting the words back in the correct order.
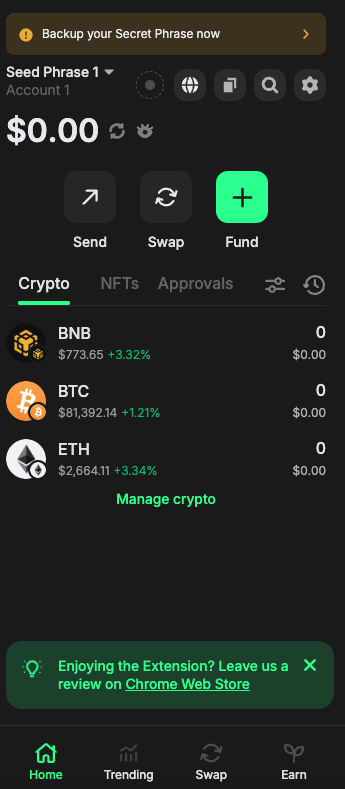
If you skip this for now, Trust Wallet will keep reminding you with a "Backup your Secret Phrase now" banner — don't ignore it for long, since it's the only way to recover your wallet.
Once secured, you'll land on the main wallet screen, showing your balance and the Send / Swap / Fund options, plus your assets under the Crypto tab.
Quick reference
| Step | Action |
|---|---|
| 1 | Agree to the terms, tap "Create new wallet" |
| 2 | Choose Fingerprint (Touch ID) or Password to secure the wallet |
| 3 | Back up your 12-word Secret Phrase, then confirm it in order |
| 4 | Land on your wallet home screen, ready to use |
Security reminders
Gas fees: creating a wallet is free. Once set up, you'll pay gas fees (paid in the network's native token, e.g. ETH or BNB) for transactions like sending, swapping, or approving tokens — paid to the network, not Trust Wallet, and non-refundable once submitted.
⚠ Always choose ETH on the Base network
QOIN lives on the Base network, and gas fees on Base are paid in ETH — but specifically Base ETH, not Ethereum mainnet ETH or ETH on another chain.
Trust Wallet's crypto selector shows several versions of ETH for different networks. When buying, always confirm the entry you pick shows "ETH" with "Base" underneath it, not just "ETH" on its own.
If you buy ETH on the wrong network, it won't be usable to pay gas for QOIN transactions on Base, and moving it between networks afterwards is a separate, extra step (a bridge transaction) that itself costs gas.
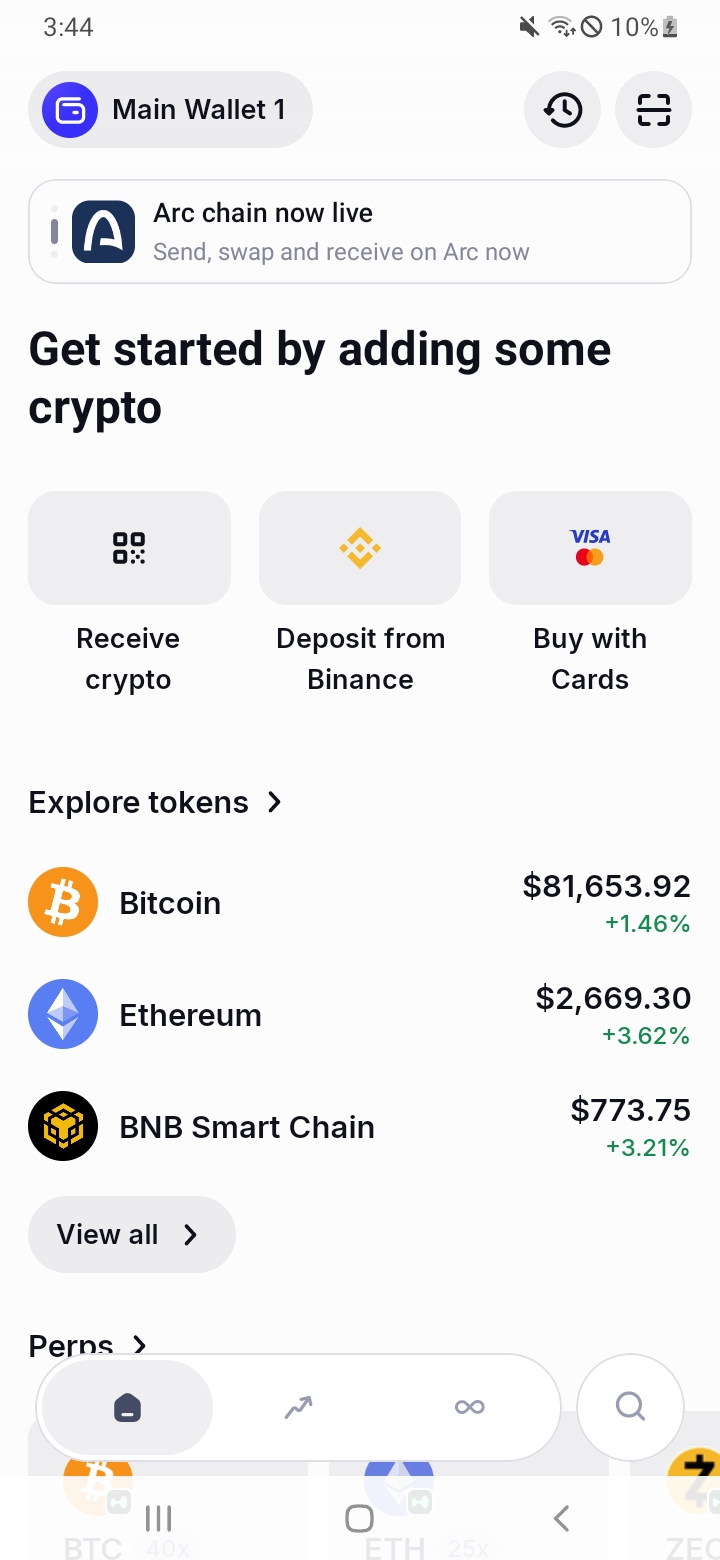
From your wallet's Home screen, tap "Buy with Cards" (or the Buy tab, depending on where you are in the app).
Before entering an amount, tap the crypto selector (top right) and check the "Select crypto" list. Make sure the entry you choose reads "ETH" with "Base" underneath it — not plain Ethereum or ETH on another network. Use "More crypto" to search for it specifically if needed.
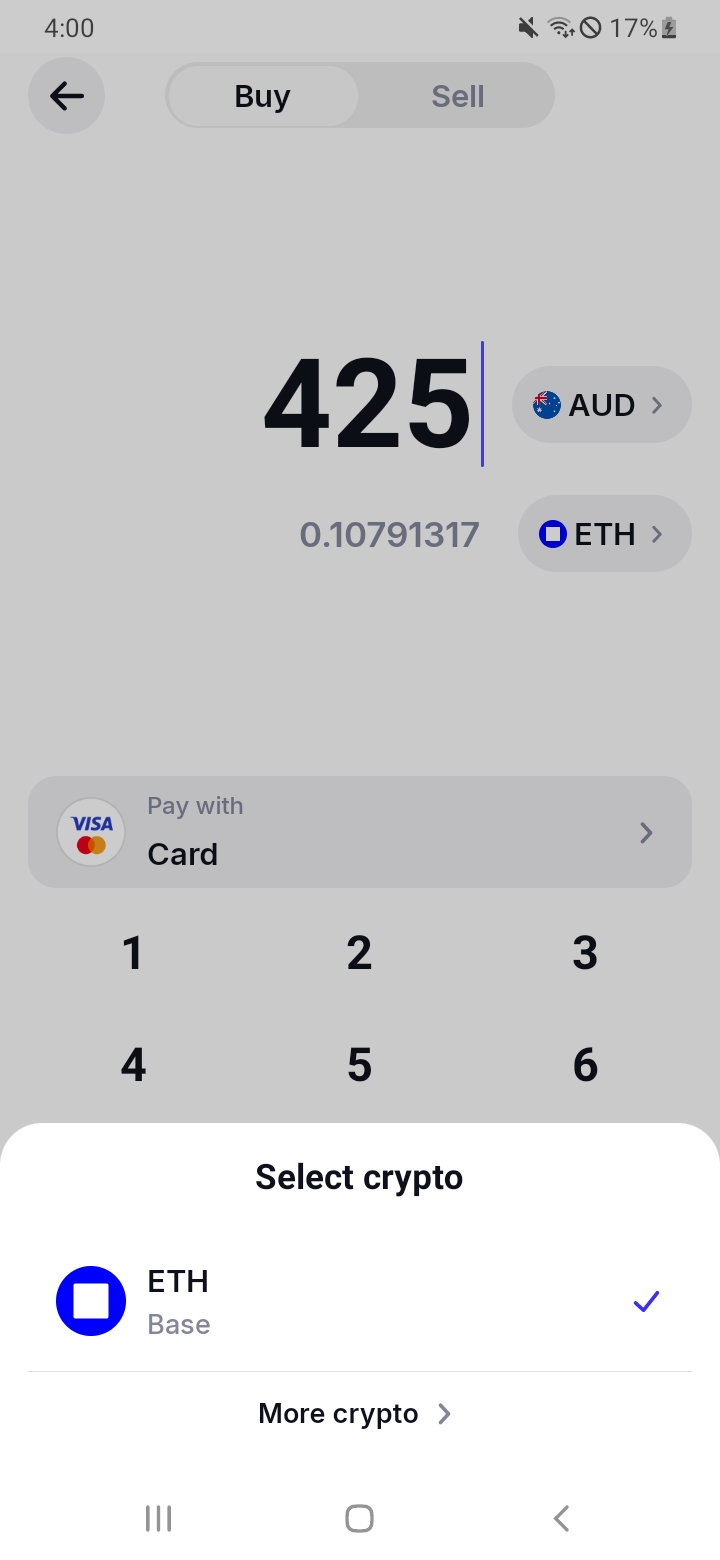
Enter how much you want to spend, then tap "Pay with Card" to choose or confirm your payment method. You only need a small amount — enough to cover a handful of gas fees, not a large holding.
Follow the remaining on-screen prompts to review the exchange rate and any fees, then confirm the purchase with your card. Once complete, the ETH appears in your Trust Wallet balance on the Base network, ready to cover gas for your next QOIN transaction.
Quick reference
| Step | Action |
|---|---|
| 1 | From Home, tap "Buy with Cards" |
| 2 | Confirm the crypto selected is "ETH / Base" |
| 3 | Enter an amount, choose your payment method |
| 4 | Review and complete the purchase |
Security reminders
Gas fees: paid in ETH on the Base network and go to the network itself, not to Trust Wallet — non-refundable once submitted. If a transaction fails from insufficient ETH, the amount you were sending isn't lost, but you'll need to top up ETH before trying again. Card purchases usually include a processing fee on top of the crypto price.
Before you start
QOIN token details (Base network)
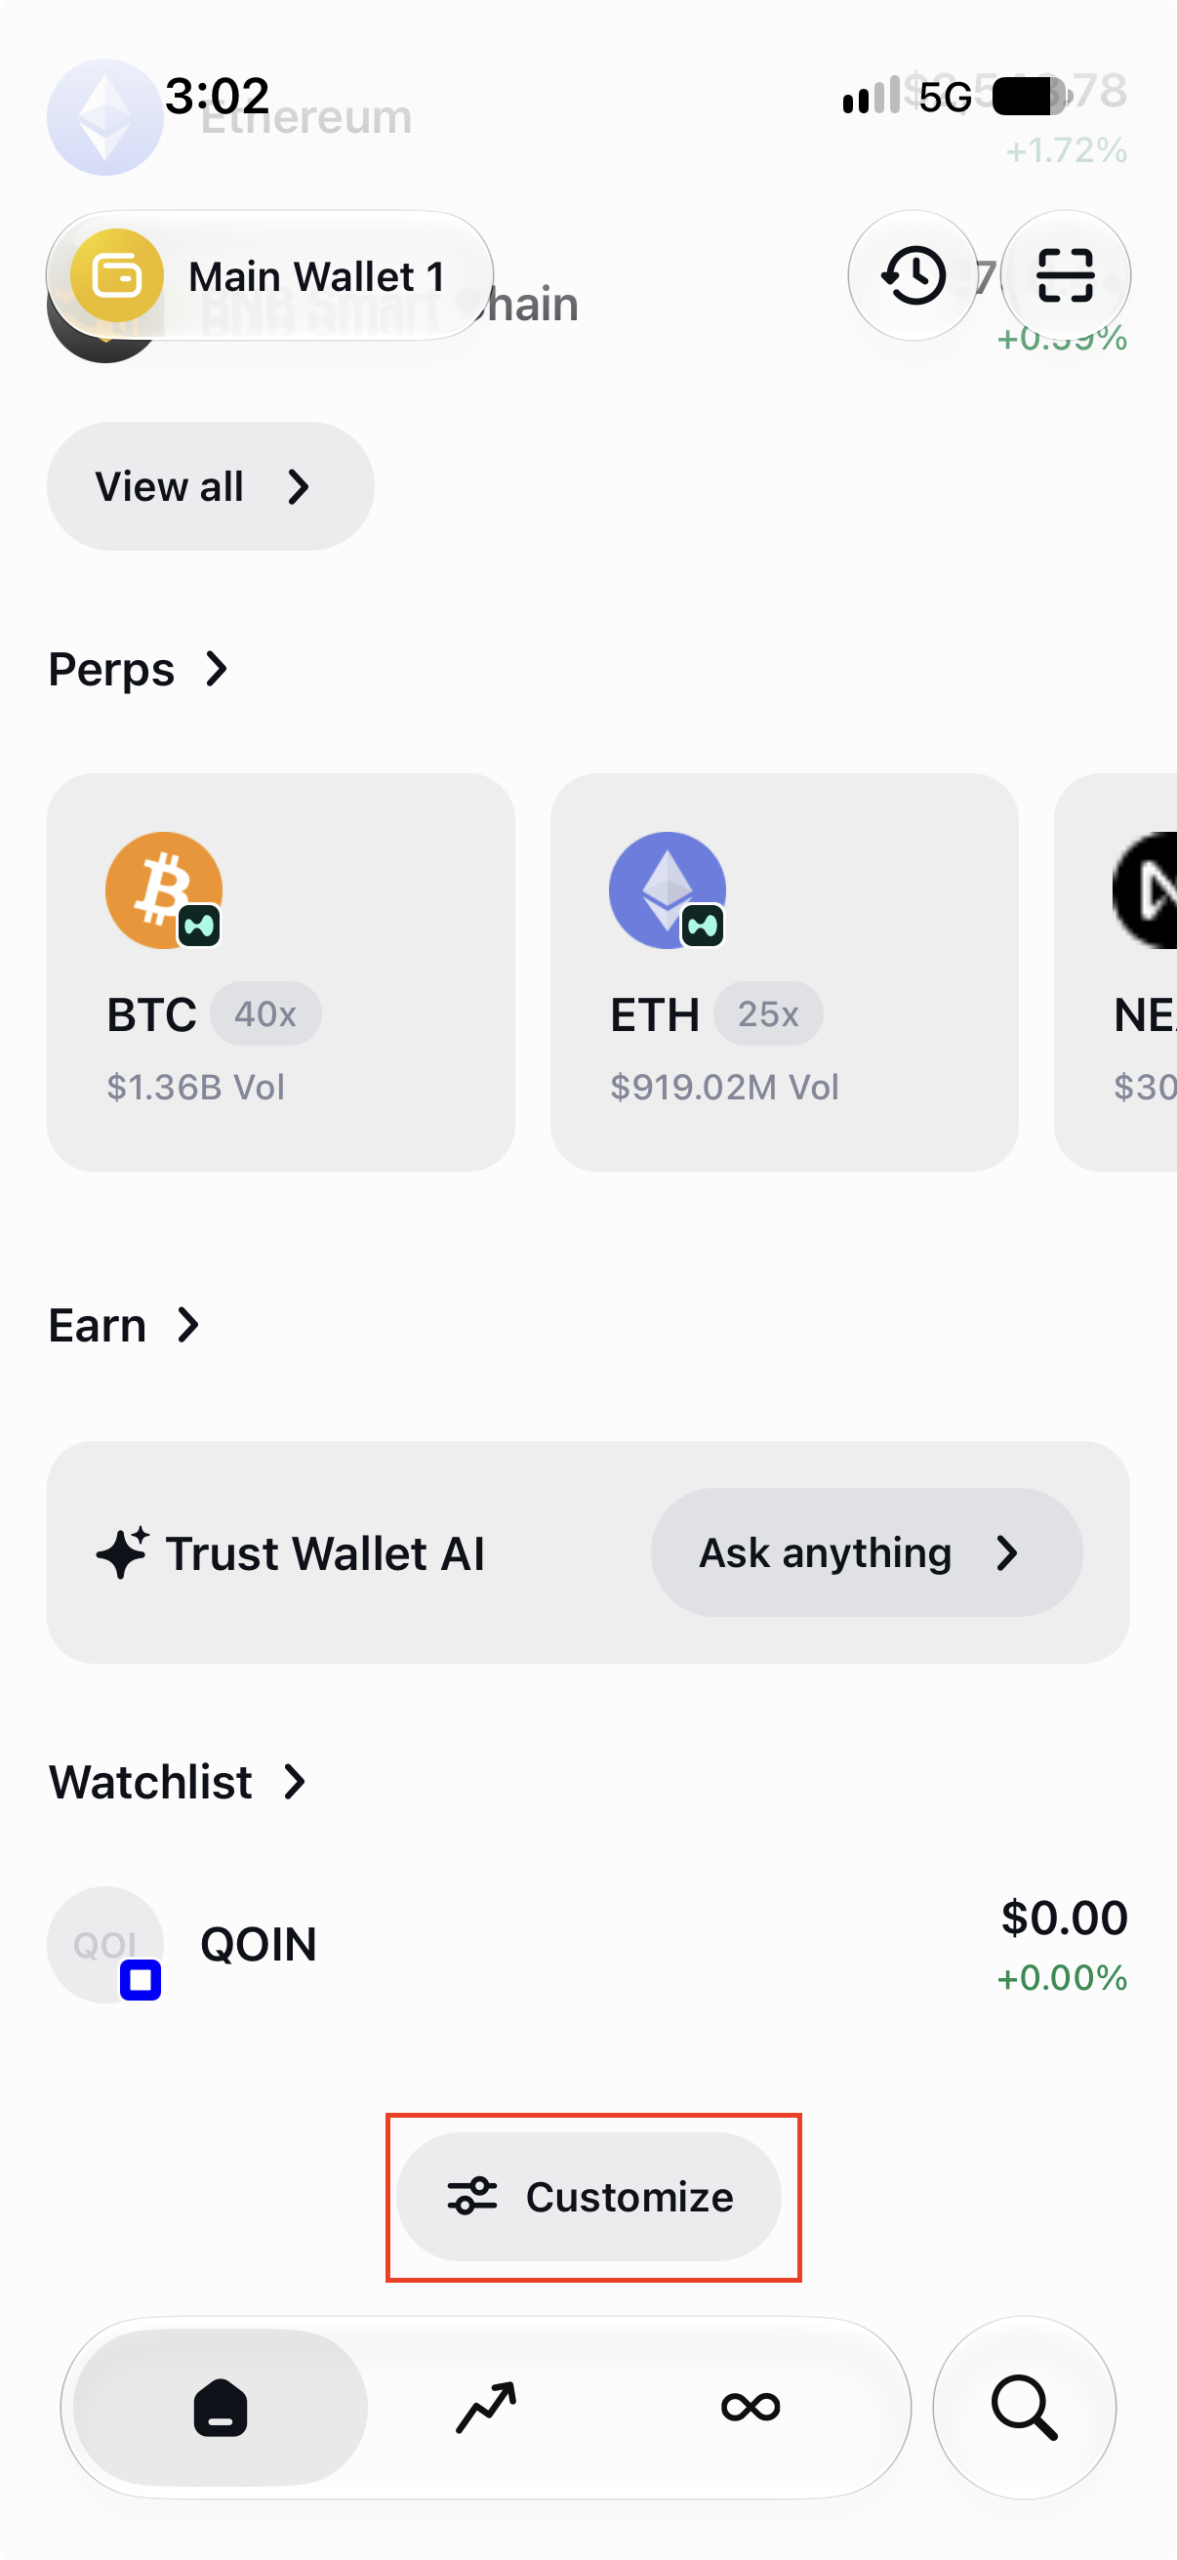
0x7ba2aCCC20861F7B0E58C0a97d1Ad94Cc29b3049Open Trust Wallet, scroll all the way to the bottom of the Home screen, and tap Customize.
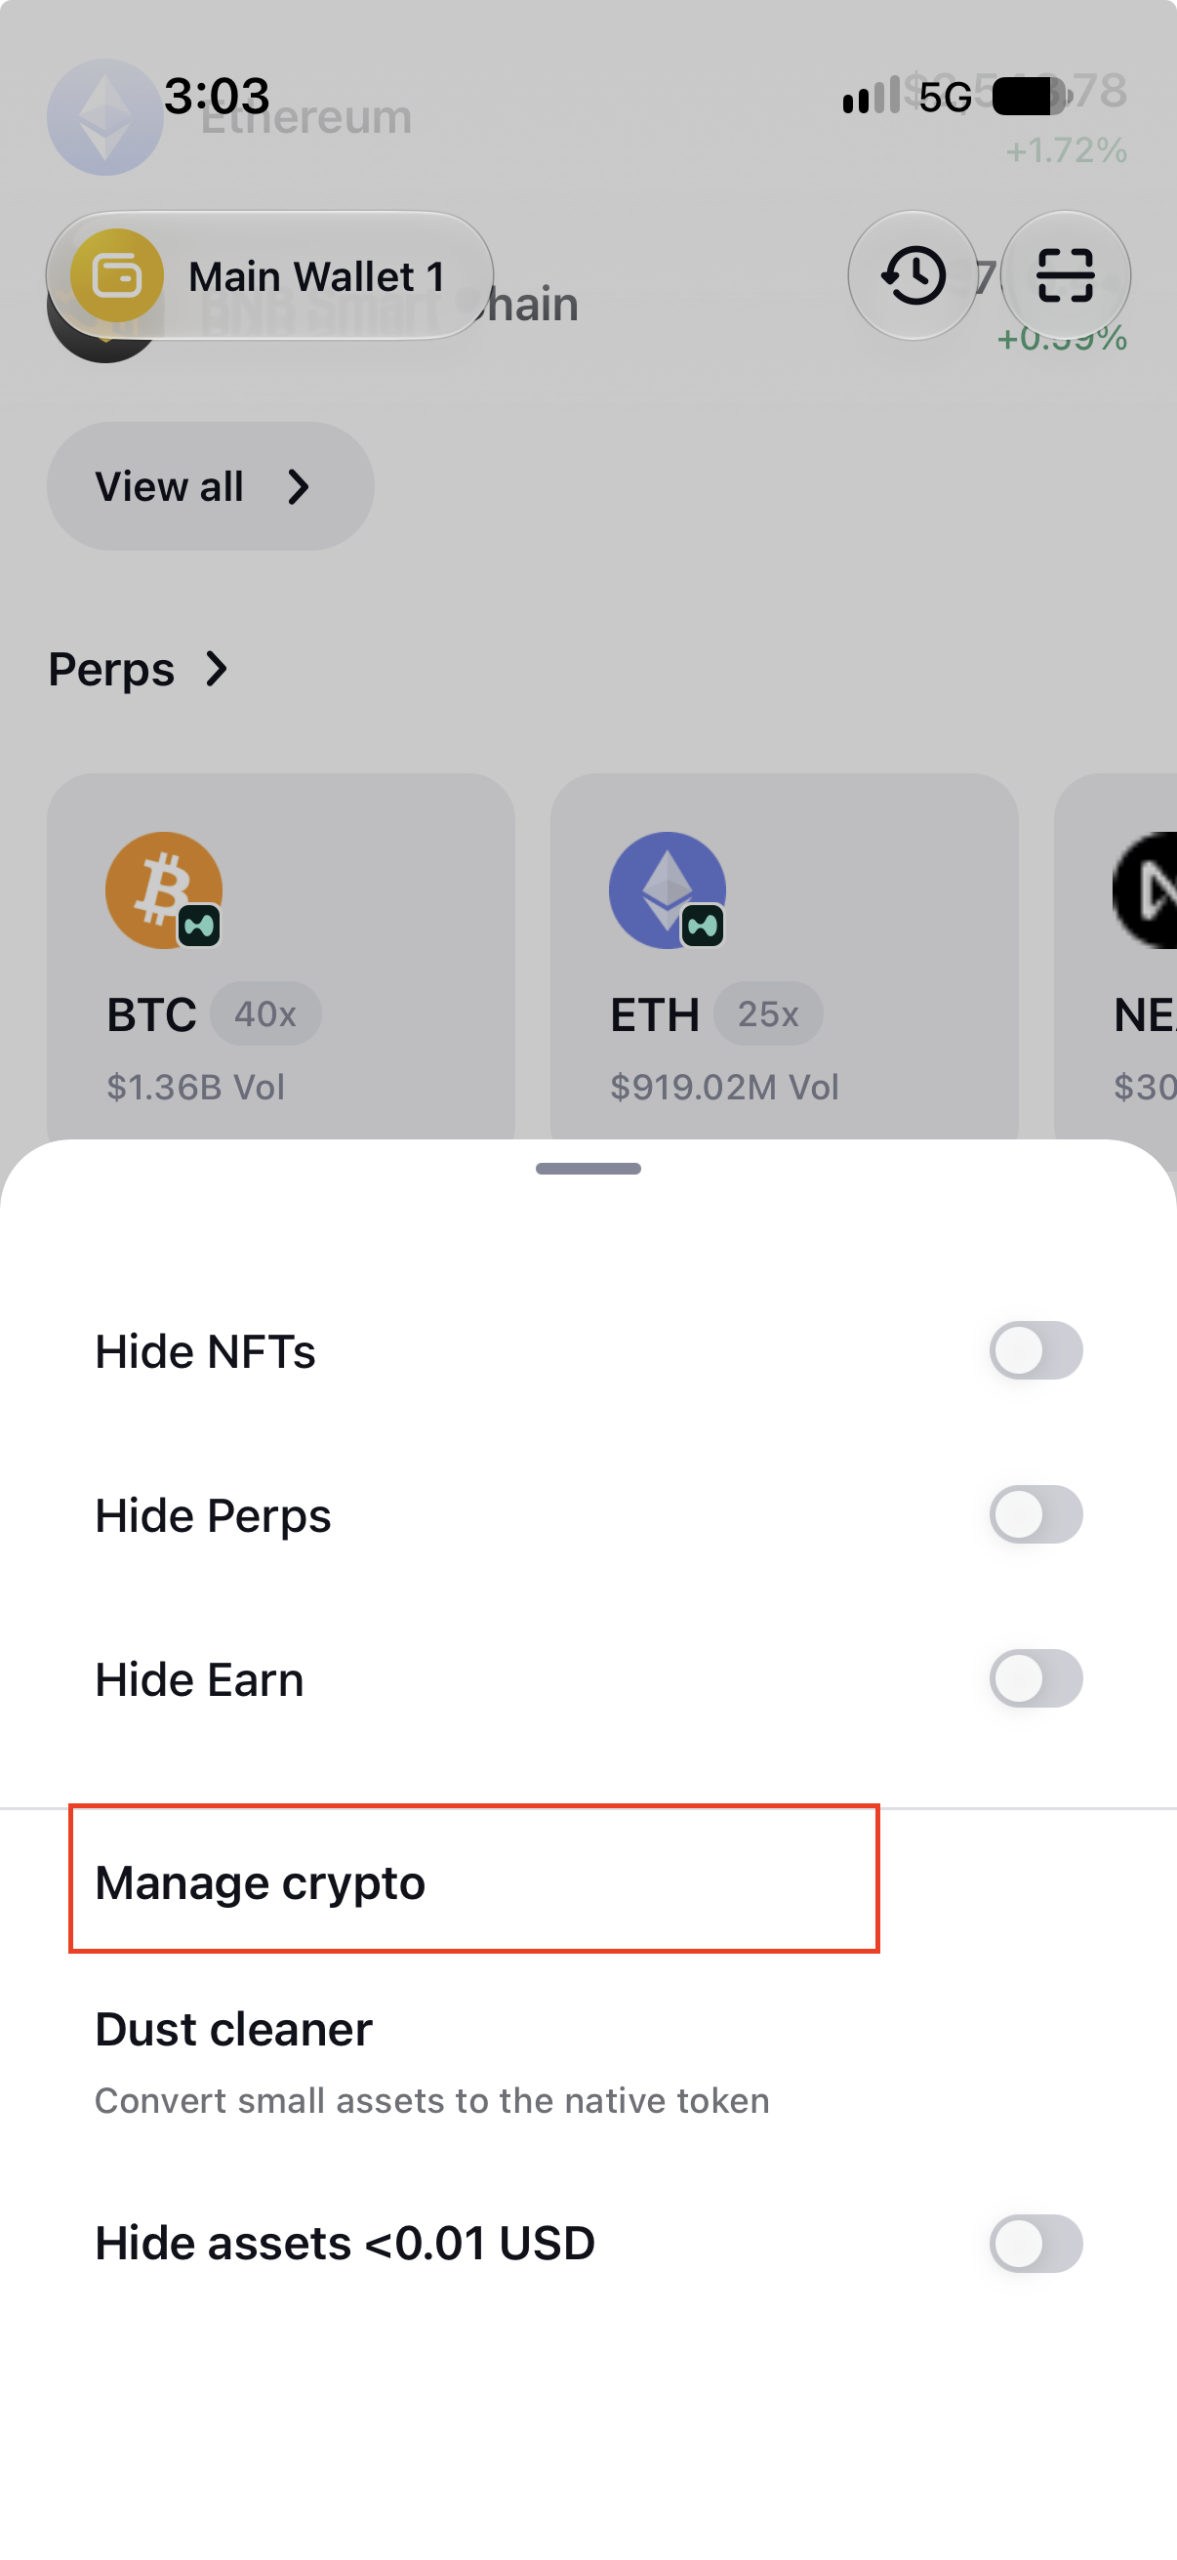
In the menu that slides up, tap Manage crypto — it's about third from the bottom.
Copy the contract address from the box above and paste it into the search bar. QOIN (Base) will appear in the results.
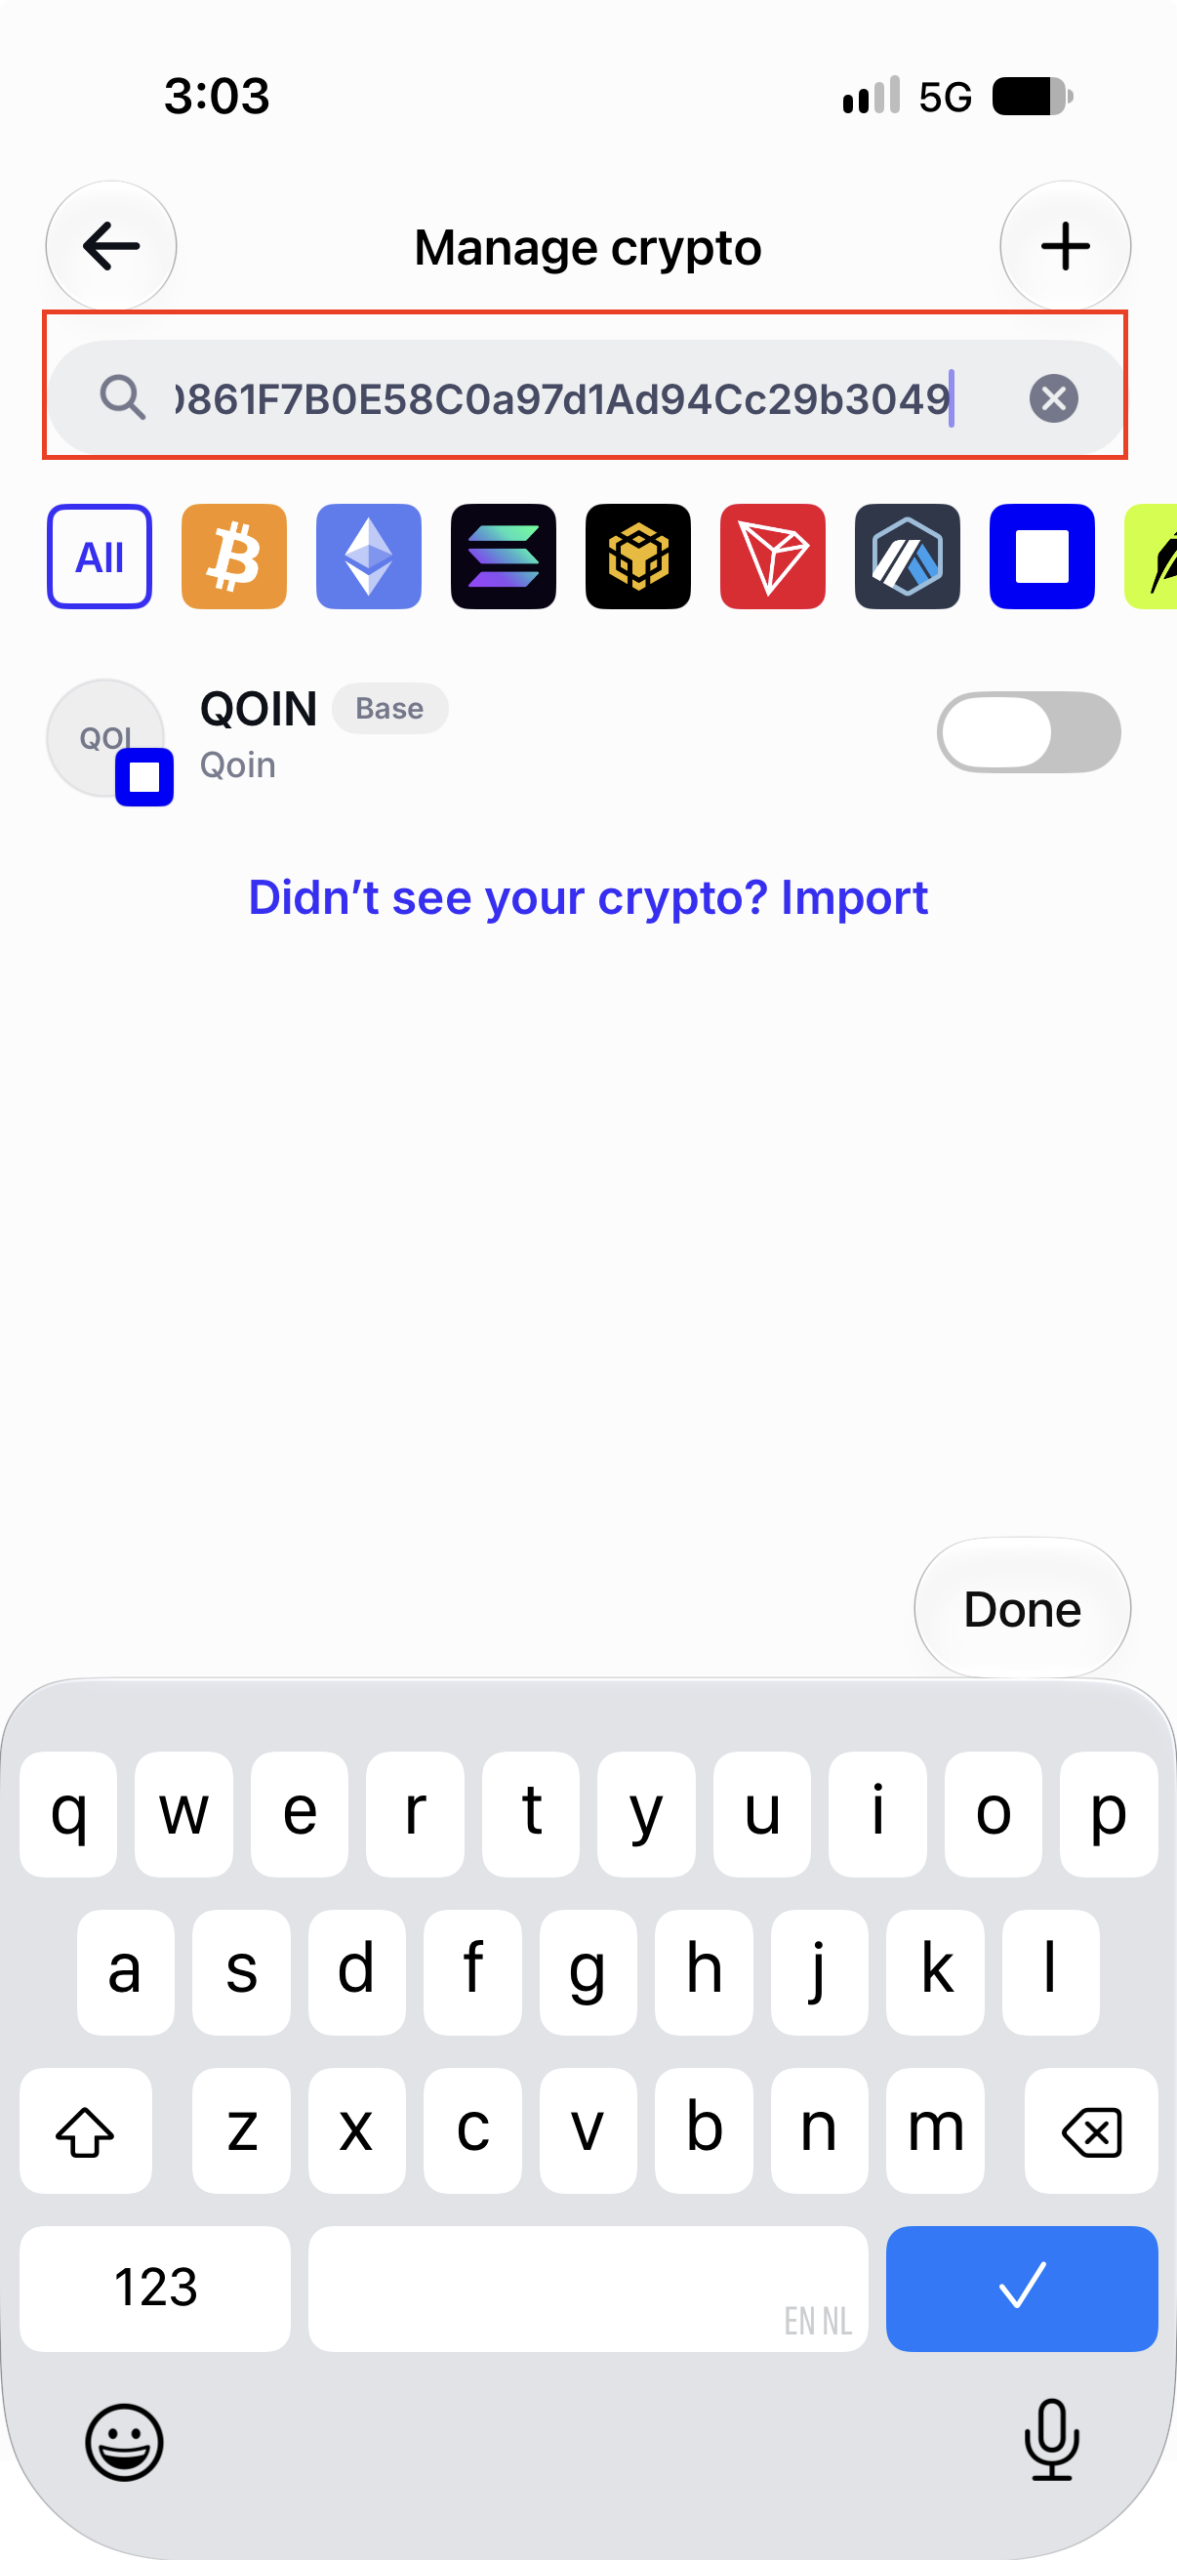
Slide the toggle next to QOIN to on (it turns blue). That's it — QOIN now shows on your Home screen.
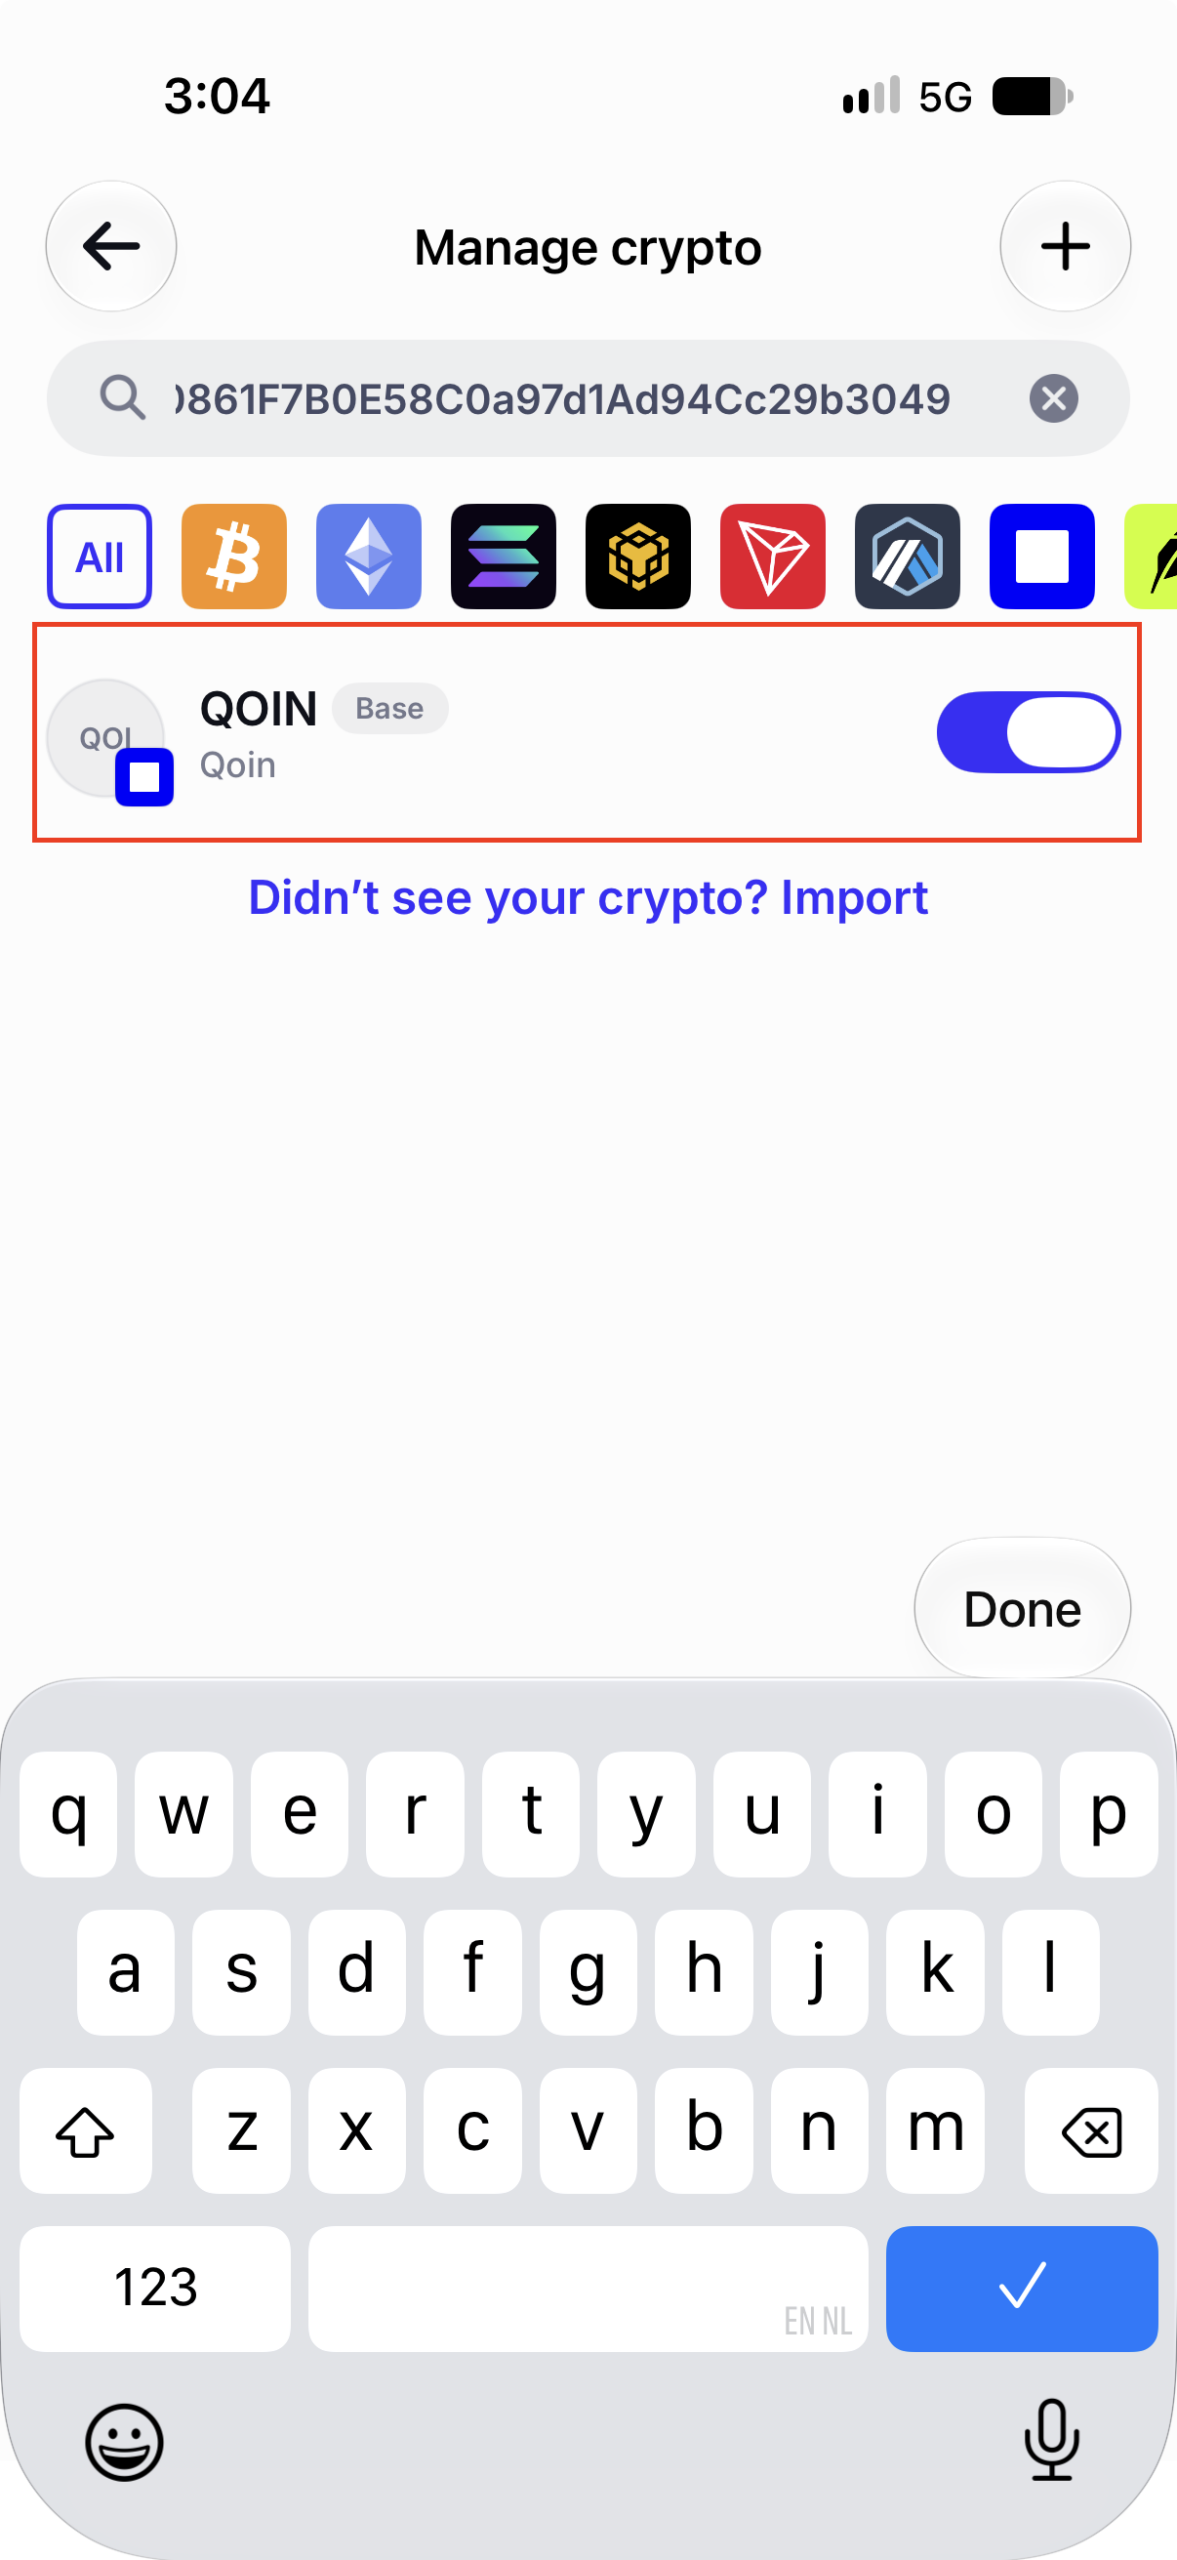
QOIN didn't show up? Import it manually
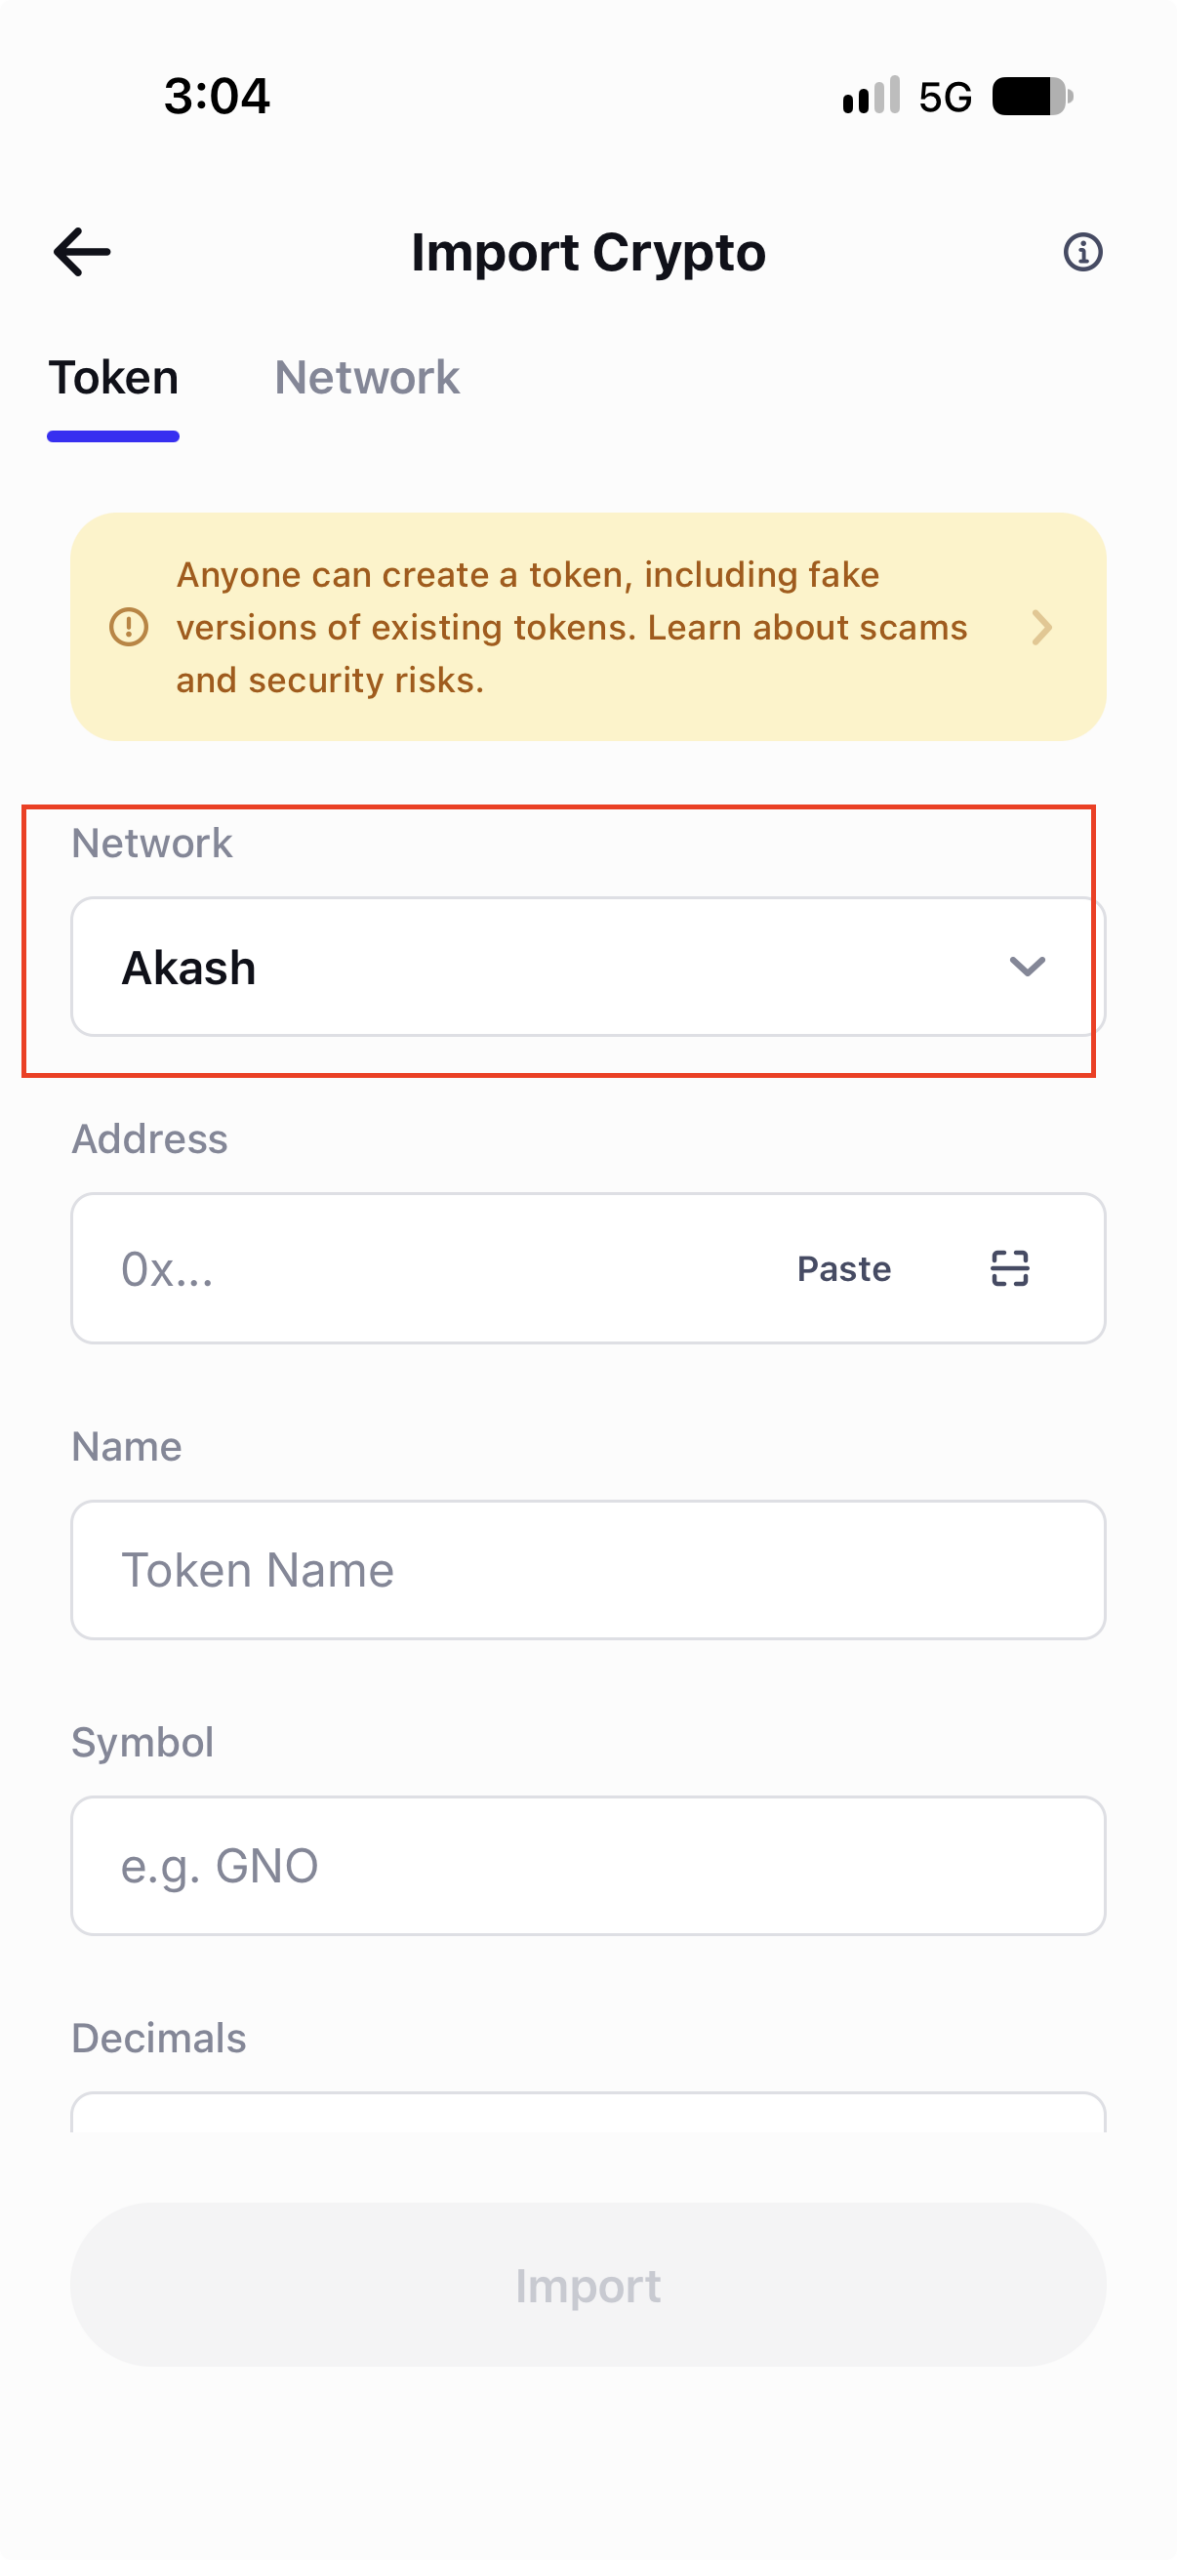
If nothing appears when you search in step 3, tap Didn't see your crypto? Import under the search bar, then follow these steps.
On the Import Crypto screen (Token tab), tap the Network dropdown.
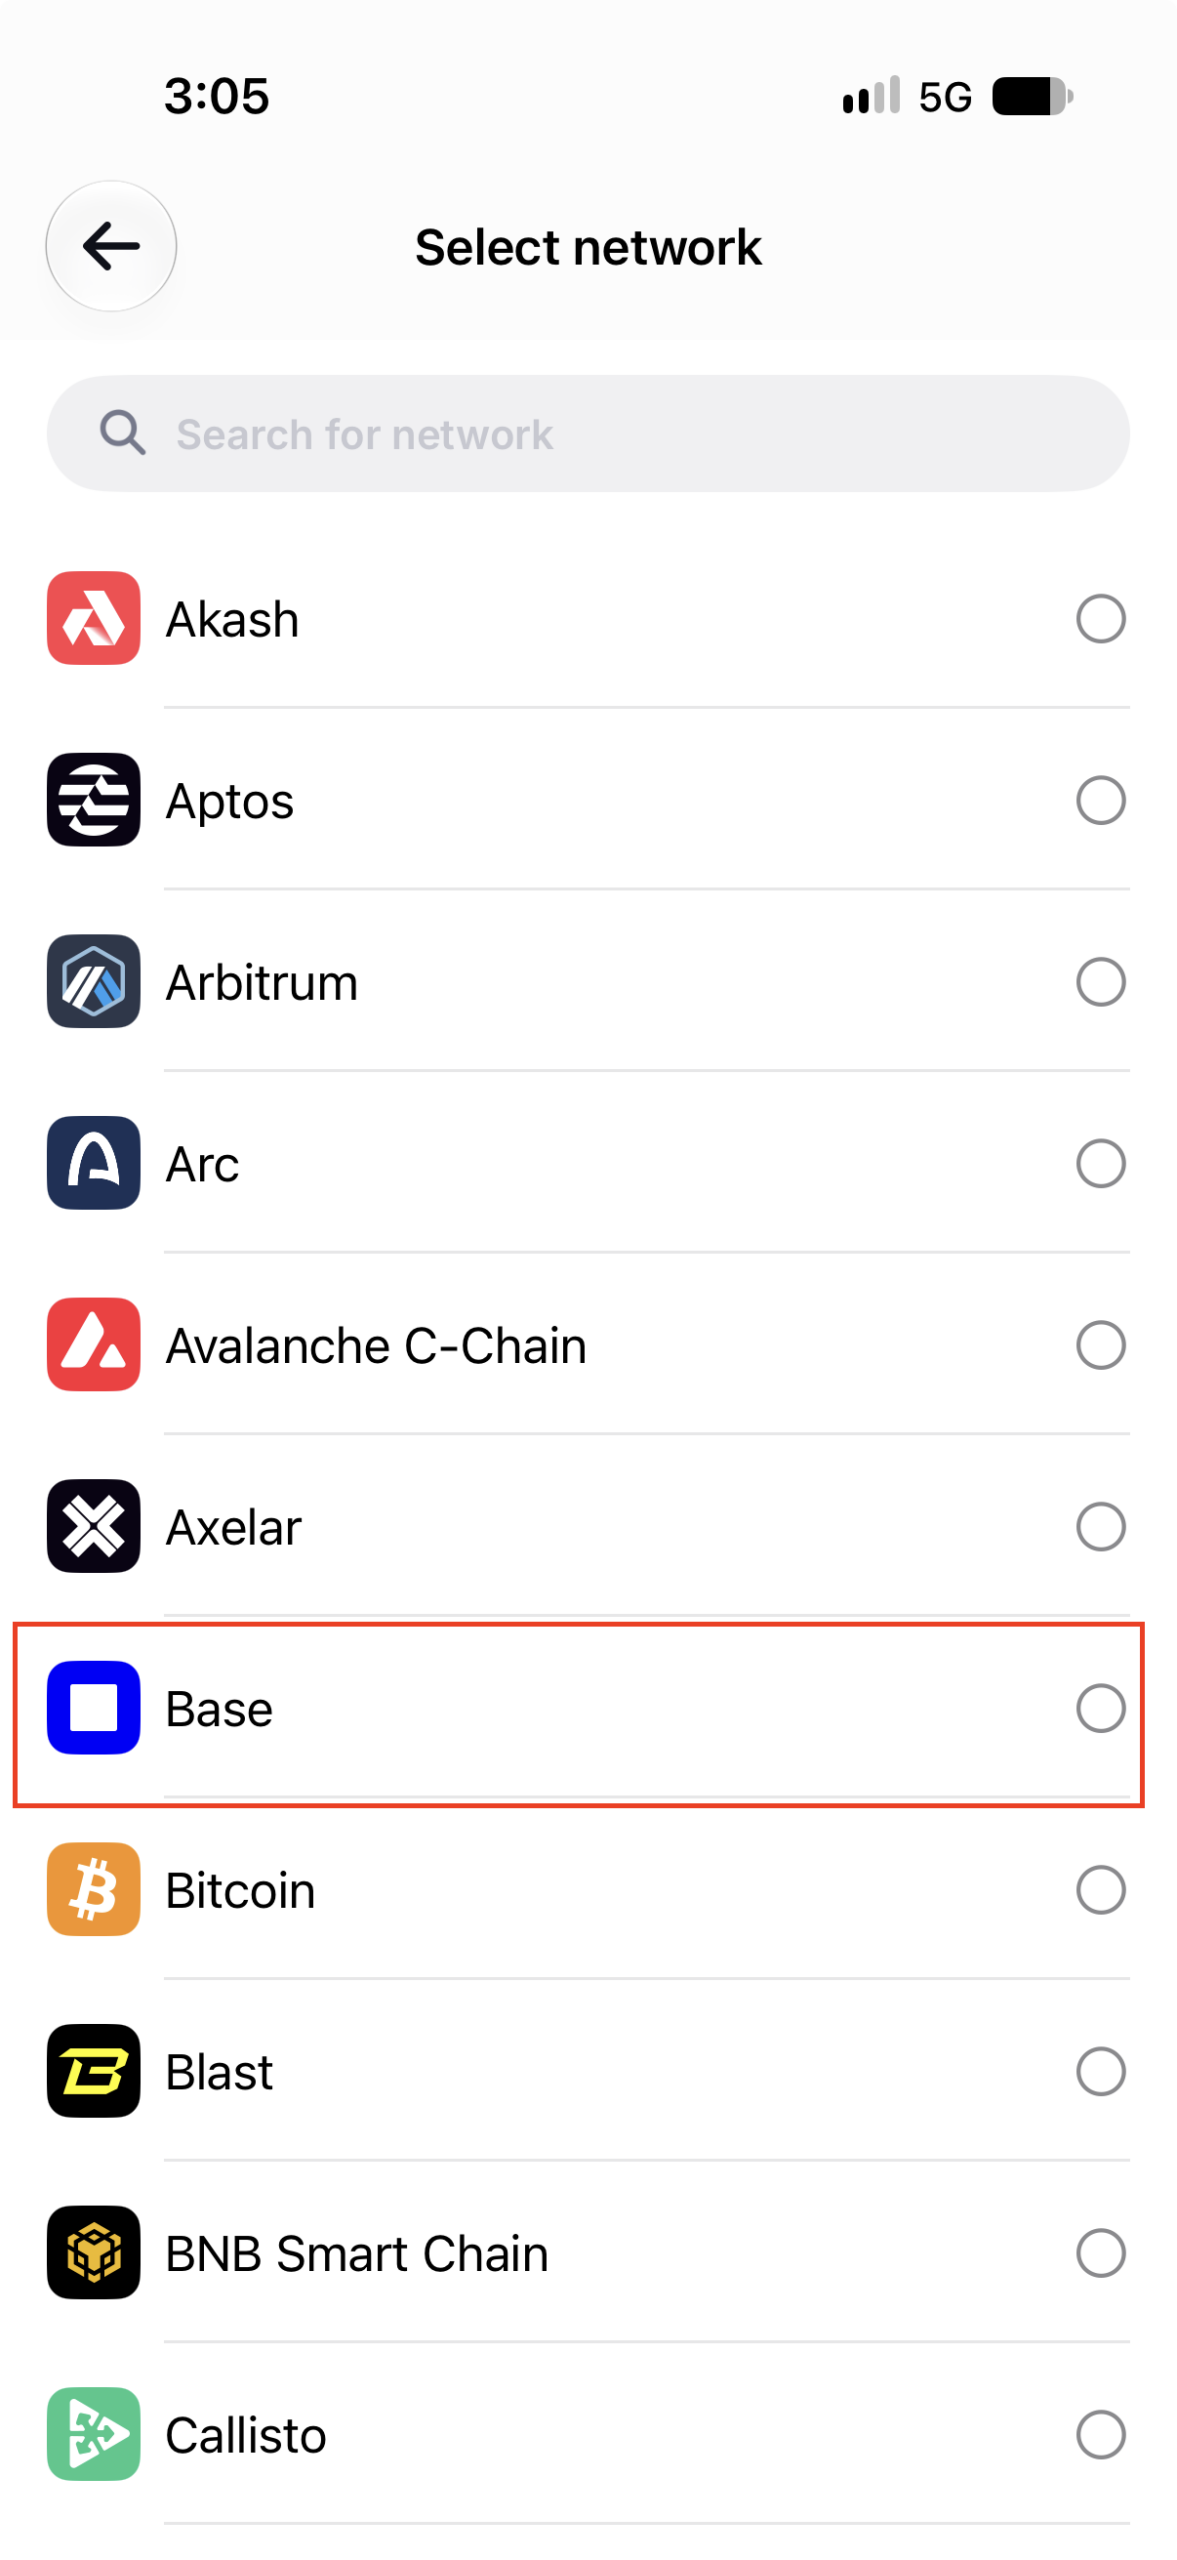
Scroll the list (or search) and tap Base.
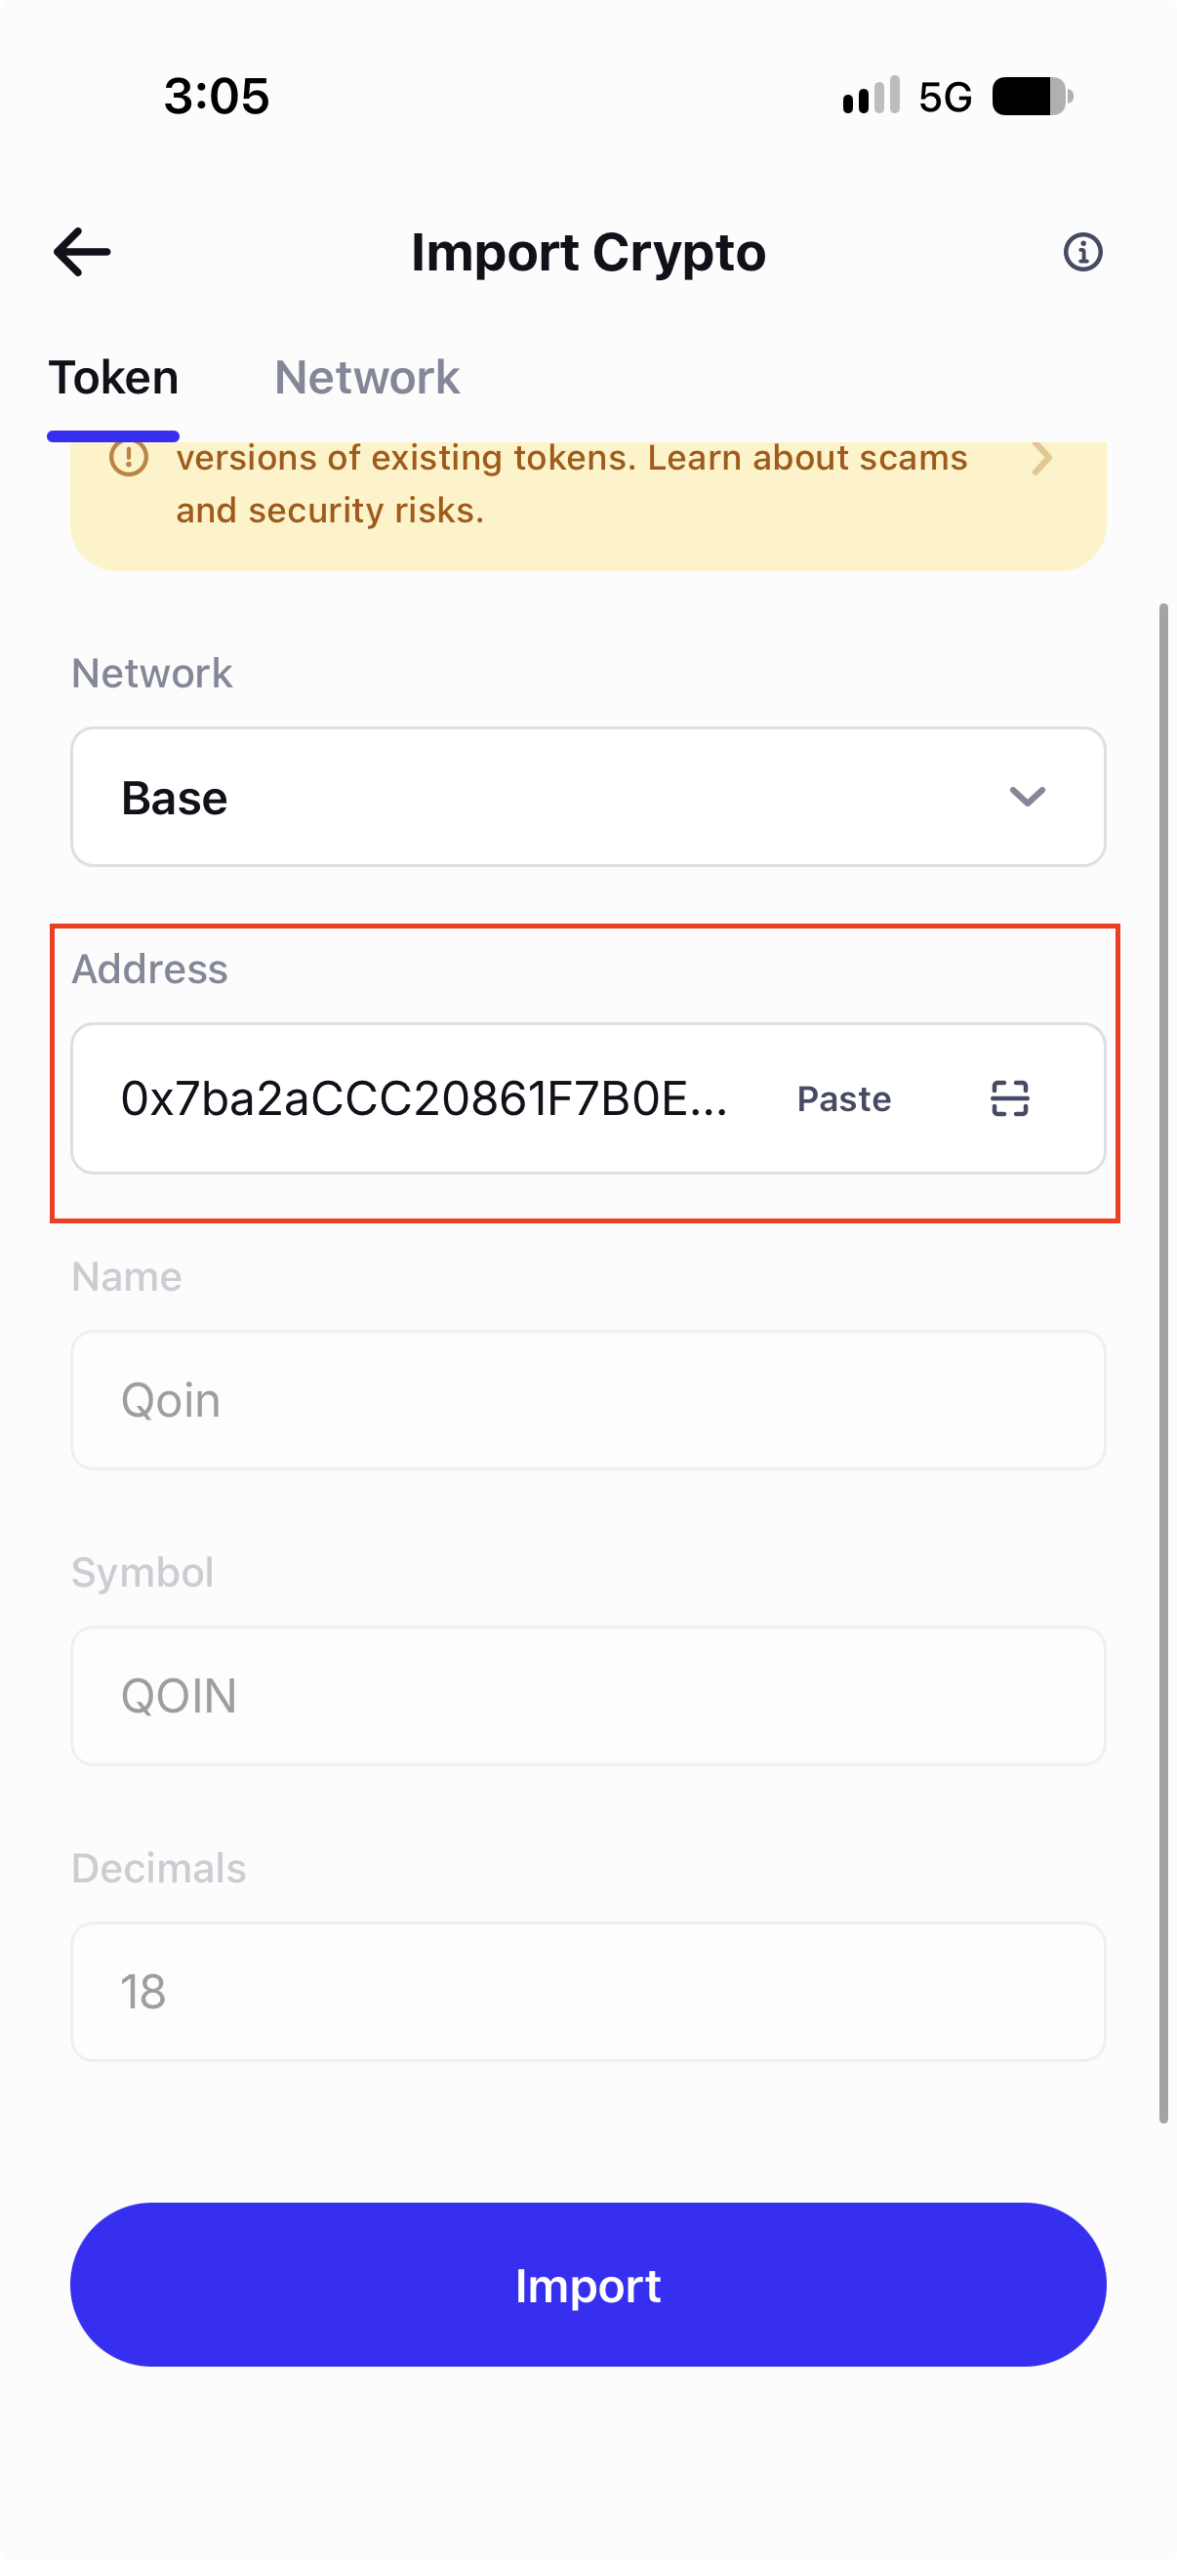
Tap Paste in the Address field to add 0x7ba2aCCC20861F7B0E58C0a97d1Ad94Cc29b3049. The rest fills in automatically — check it shows Name Qoin, Symbol QOIN and Decimals 18, then tap Import.
Quick reference
| Step | Action |
|---|---|
| 1 | Scroll to the bottom of Home and tap Customize |
| 2 | Tap Manage crypto |
| 3 | Paste the QOIN contract address into the search bar |
| 4 | Switch the QOIN toggle on — done |
| 5 | If QOIN doesn't appear: tap "Didn't see your crypto? Import", then the Network dropdown |
| 6 | Select Base |
| 7 | Paste the contract address, check it says QOIN, tap Import |
Security reminders
⚠ Always double-check the network is set to Base
QOIN is a token on the Base network. Trust Wallet's Receive screen shows a different address for each network, so if the network selector isn't set to "Base" when you copy or share your address, QOIN sent to it may not arrive.
Trust Wallet itself warns: "Only send Base assets to this address. Other assets will be lost forever." Sending QOIN to an address generated for the wrong network is not reversible.
Before copying, sharing, or showing your QR code to someone sending you QOIN, glance at the network pill just above the QR code and confirm it reads "Base."
QOIN token details
0x7ba2aCCC20861F7B0E58C0a97d1Ad94Cc29b3049From your wallet's Home screen, tap "Receive crypto" (or the Receive action, depending on where you are in the app).
On the Receive screen, check the network pill just below the "Receive" title. If it doesn't already say "Base," tap it and select Base from the list. QOIN only exists on Base, so this matters every time — don't assume it's still set the way you left it.
Once the network reads "Base," you'll see your QR code and address underneath. Use "Copy" to copy it to your clipboard, "Share" to send it to someone else, or let them scan the QR code directly.
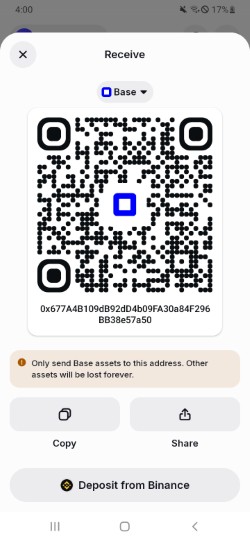
Only use this address for QOIN or other assets on the Base network. As Trust Wallet warns on this screen, sending an asset from a different network to this address results in permanent loss of funds.
Quick reference
| Step | Action |
|---|---|
| 1 | From Home, tap "Receive crypto" |
| 2 | Confirm (or switch) the network selector to "Base" |
| 3 | Copy the address, share it, or show the QR code |
| 4 | Only use this address for QOIN / other Base assets |
Security reminders
⚠ Transfers are final — read this before you send
Crypto transfers cannot be reversed or cancelled once confirmed. If you send to the wrong address, or on the wrong network, there is no way for Opteq, Trust Wallet, or anyone else to get those funds back.
Always double-check that Trust Wallet's network selector is set to Base before you copy your receiving address — QOIN only exists on Base, and an address copied on the wrong network will not work correctly.
Always copy your Trust Wallet address fresh, right before you use it. Don't rely on an address you saved from memory or an old message.
We recommend sending a small test amount first, confirming it arrives safely in Trust Wallet, and only then sending the rest of your balance.
Before you start
Open your Opteq wallet and confirm you're logged in to the wallet holding your QOIN balance. You should see your balance and QOIN amount on the dashboard.
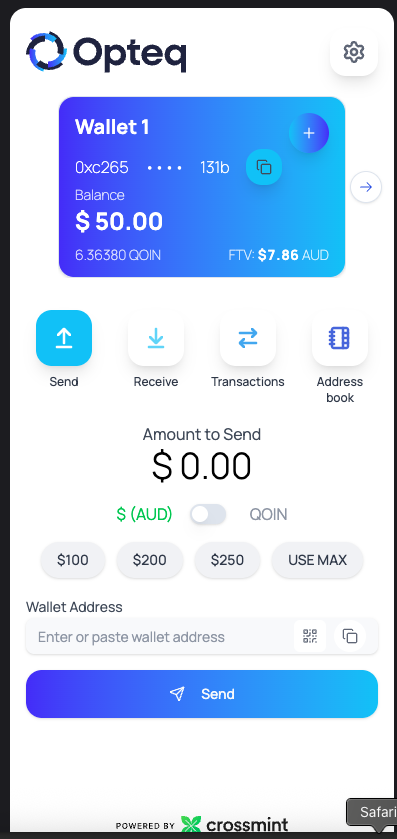
Open Trust Wallet and tap "Receive." Check the network selector just below the "Receive" title — if it doesn't already say "Base," tap it and choose Base. Once it's set correctly, tap "Copy" to copy your address.
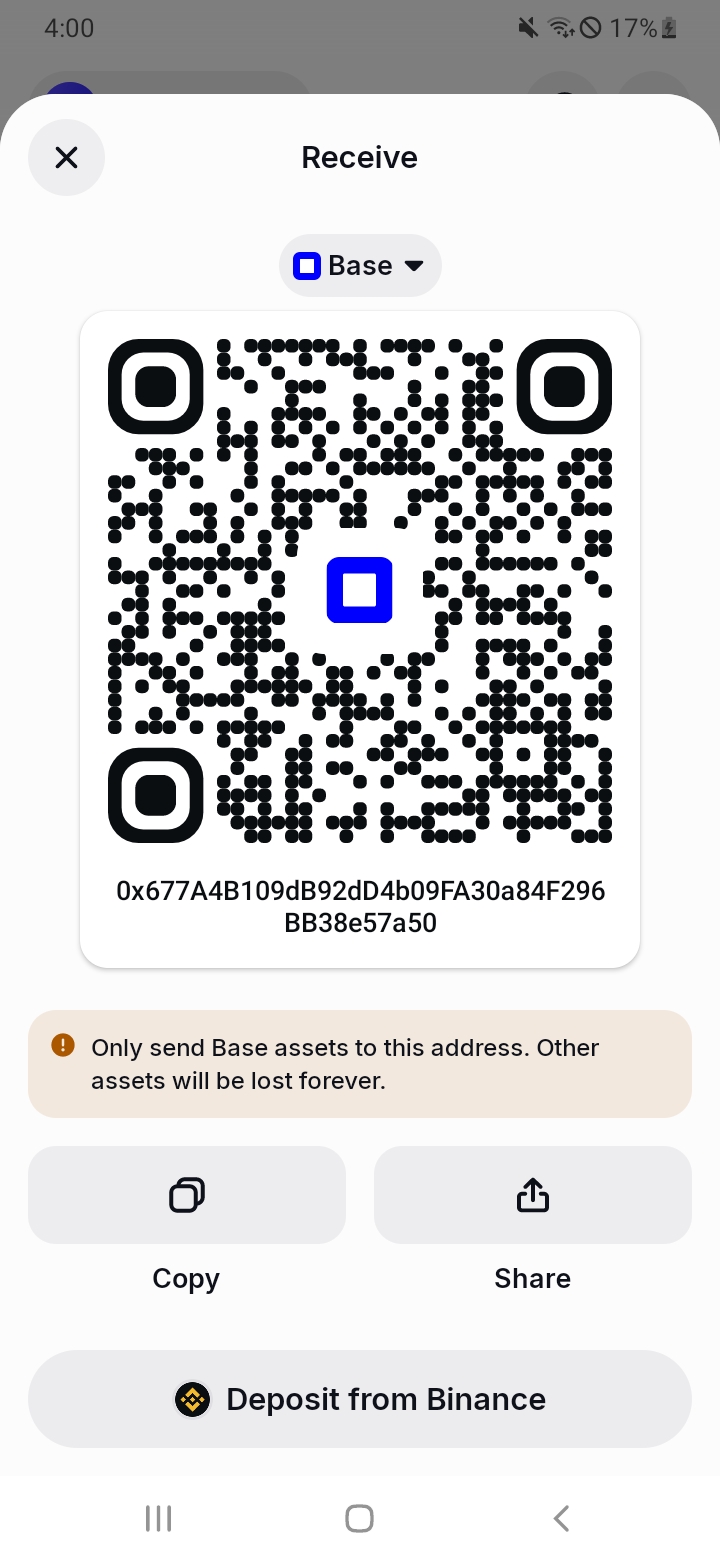
Switch back to Opteq and select "Send." Paste the Trust Wallet address into "Wallet Address," toggle the amount to QOIN, and enter a small test amount — not your full balance. Double-check the pasted address matches character-for-character, then tap "Send."
Sending a small amount first costs a little extra in gas, but it confirms the address and network are correct before you commit your full balance to an irreversible transfer.
Wait for the transaction to confirm on-chain, then check the QOIN token page in Trust Wallet. Your balance should reflect the test amount you sent.
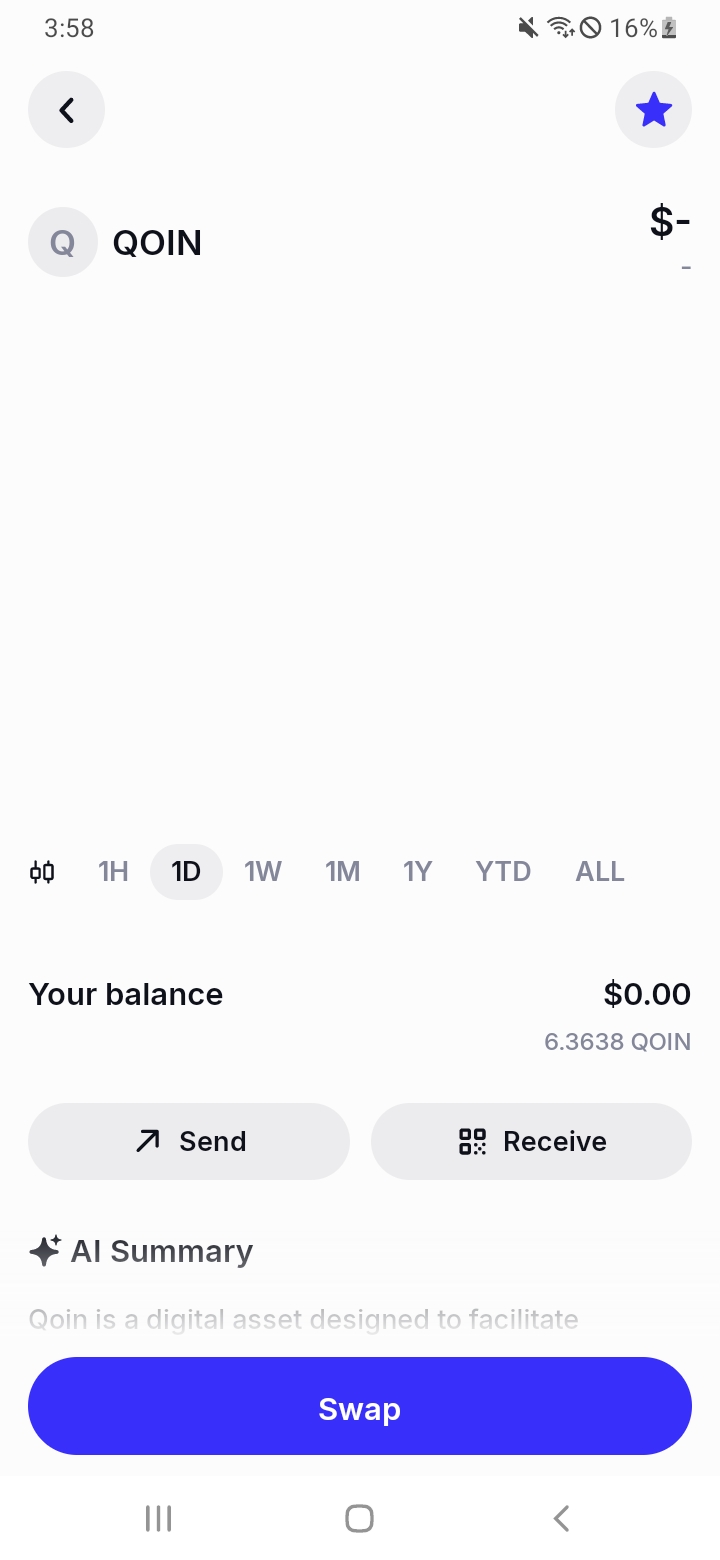
Once you've confirmed the test amount arrived safely, go back to Opteq and repeat Step 3 with the same address to send the remainder of your QOIN — or tap "USE MAX" to send everything that's left.
Quick reference
| Step | Action |
|---|---|
| 1 | Open Opteq, confirm you're logged in |
| 2 | In Trust Wallet, confirm Base is selected, copy your address |
| 3 | In Opteq, paste the address, send a small test amount |
| 4 | Confirm the test amount arrived in Trust Wallet |
| 5 | Send the rest of your QOIN balance |
Security reminders
Gas fees: sending QOIN from Opteq to Trust Wallet is an on-chain transaction and requires a gas fee, separate from the amount transferred. Gas fees go to the network, not to Opteq or Trust Wallet, and can't be refunded once submitted. Sending a small test amount first means paying gas twice, but it's cheap insurance against sending your full balance to the wrong place.
MetaMask
Before you start
What you'll need
Open MetaMask in your browser and make sure you're logged in to the account you want to receive the funds. Your account address shows at the top, just under the account name.
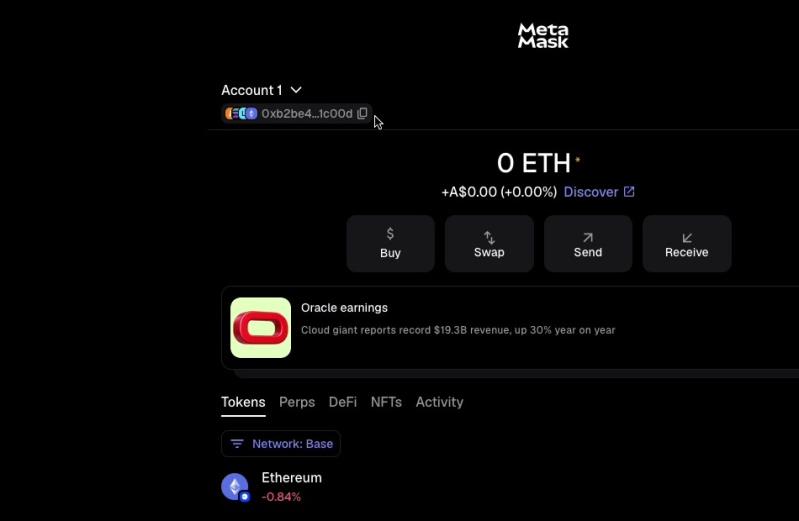
Click your account address at the top of the MetaMask window — you'll see a brief "Ethereum address copied" confirmation.
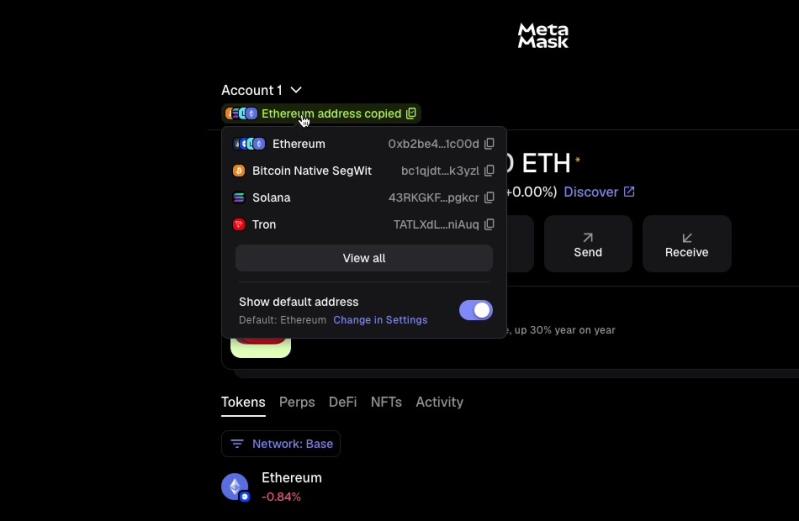
Tip: MetaMask supports multiple networks. Make sure you copy the address for the correct one — typically Ethereum for an EVM-based transfer.
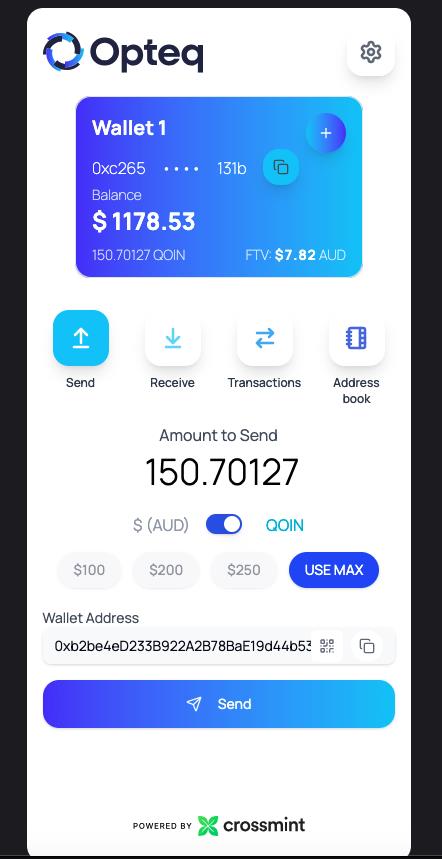
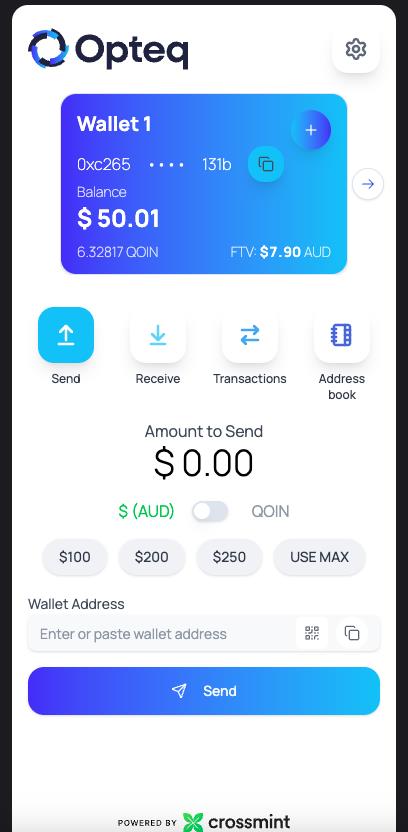
Log in to your Opteq wallet in another browser tab, then select "Send" on your wallet dashboard.
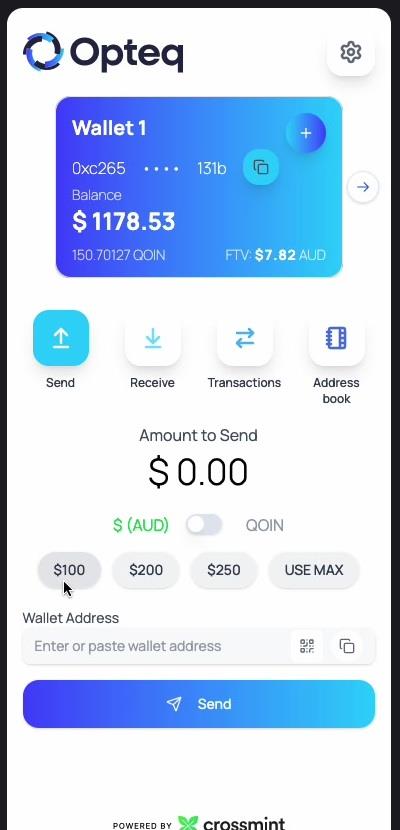
Click into "Wallet Address" and paste the address from Step 2 (Ctrl+V / Cmd+V, or the paste icon next to the field).
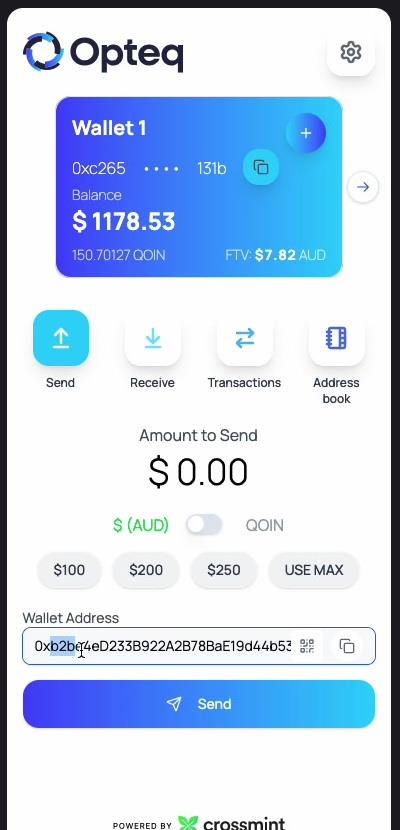
Toggle from $ (AUD) to QOIN, then tap "USE MAX" to send your full balance — or enter a smaller custom amount.
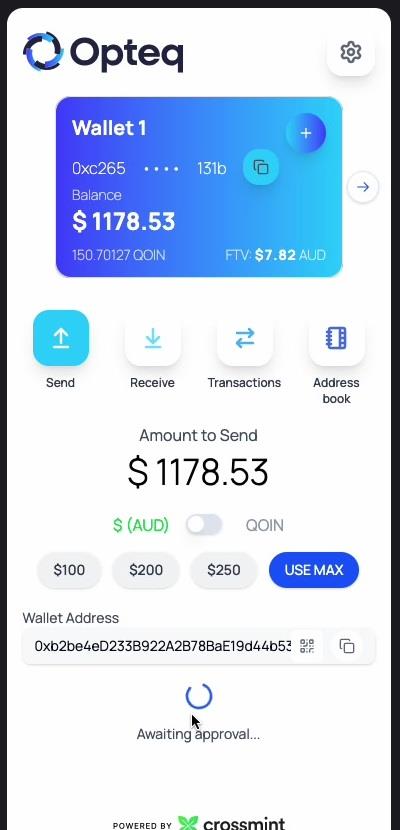
Opteq shows "Awaiting approval..." — complete the prompt with your passkey or device signer to confirm the transfer.
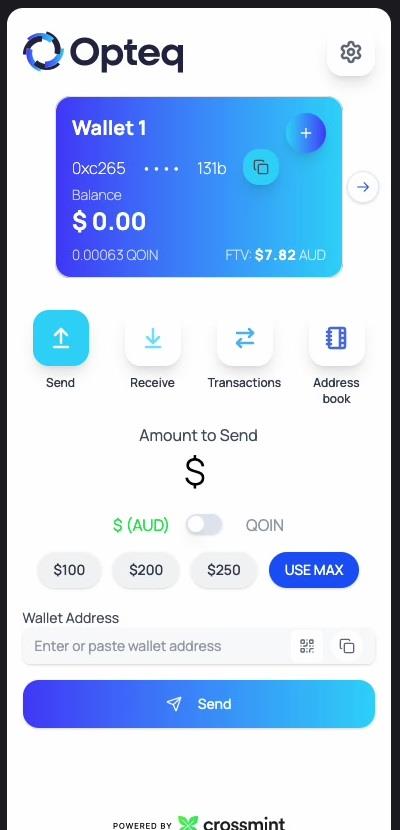
A "Success — Funds Transferred" confirmation appears. Your Opteq balance updates, and QOIN arrives in MetaMask shortly after (network confirmation times vary).
Quick reference
| Step | Action |
|---|---|
| 1 | Log in to MetaMask |
| 2 | Click your account address to copy it |
| 3 | Log in to Opteq and open "Send" |
| 4 | Paste your MetaMask address into Wallet Address |
| 5 | Toggle to QOIN, tap "USE MAX" |
| 6 | Tap "Send," approve with passkey / device signer |
| 7 | Confirm "Success — Funds transferred" |
Security reminders
Gas fees: sending QOIN is an on-chain transaction and requires a gas (network) fee, separate from the amount transferred. You're responsible for your own gas fees — make sure the sending wallet holds enough of the network's native token to cover it.
Before you start
QOIN token details (Base network)
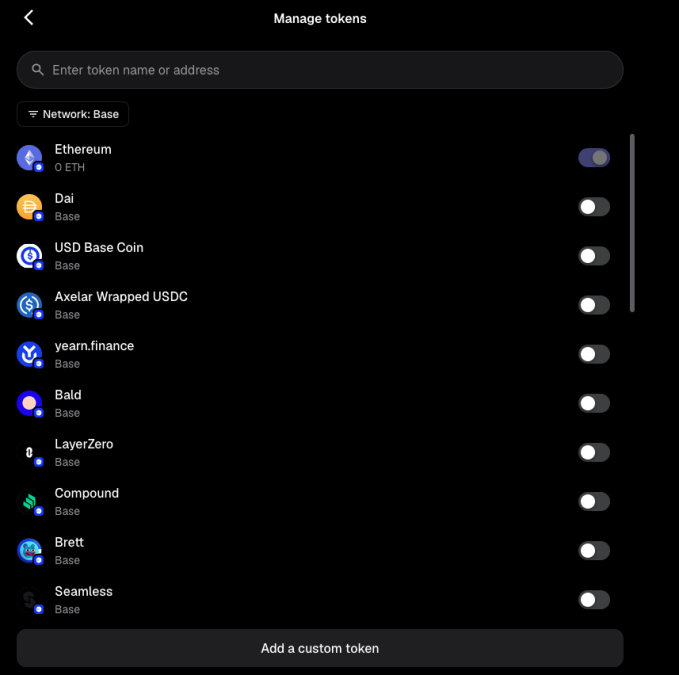
0x7ba2aCCC20861F7B0E58C0a97d1Ad94Cc29b3049Open MetaMask, confirm you're on the Base network, click the three-dot menu above your token list, then select "Manage tokens."
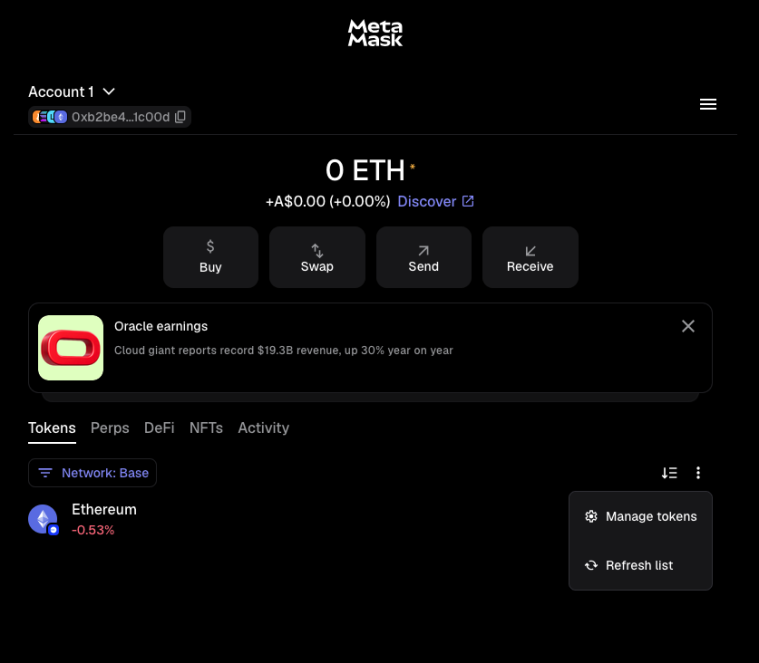
Scroll to the bottom of "Manage tokens" and select "Add a custom token" — QOIN won't be in the default list.
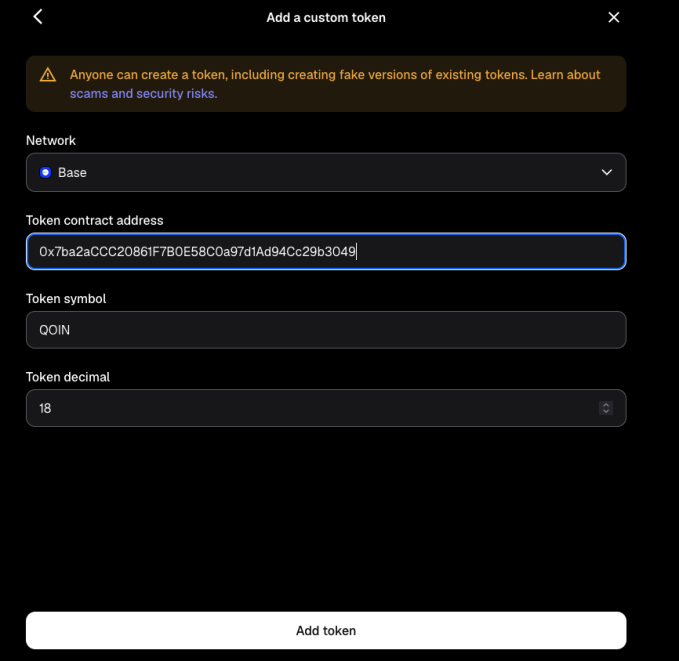
Confirm the network is set to Base, then paste the contract address above into "Token contract address." MetaMask auto-fills the symbol and decimals — select "Add token."
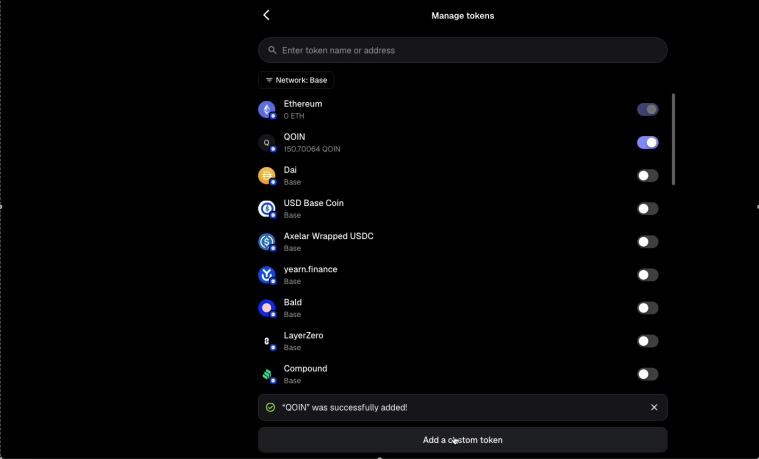
MetaMask shows "'QOIN' was successfully added!" and QOIN appears in your token list with your current balance.
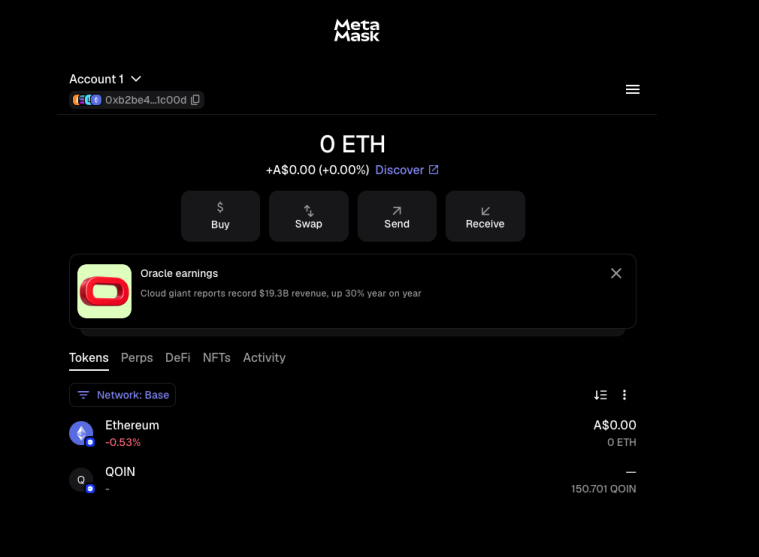
Back on your main wallet screen, QOIN now appears under "Tokens" alongside your other assets.
Quick reference
| Step | Action |
|---|---|
| 1 | Three-dot menu above token list → "Manage tokens" |
| 2 | Select "Add a custom token" |
| 3 | Set network to Base, paste the QOIN contract address |
| 4 | Confirm symbol (QOIN) and decimal (18), tap "Add token" |
| 5 | Check QOIN appears under Tokens with your balance |
Security reminders
Gas fees: adding QOIN is free, but any transaction with it afterward requires a gas fee, paid in the network's native token. Gas fees go to the network, not MetaMask, and can't be refunded once submitted.
Before you start
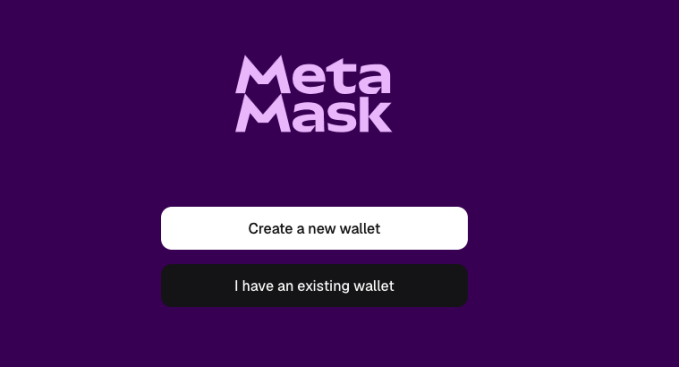
On the welcome screen, select "Create a new wallet."
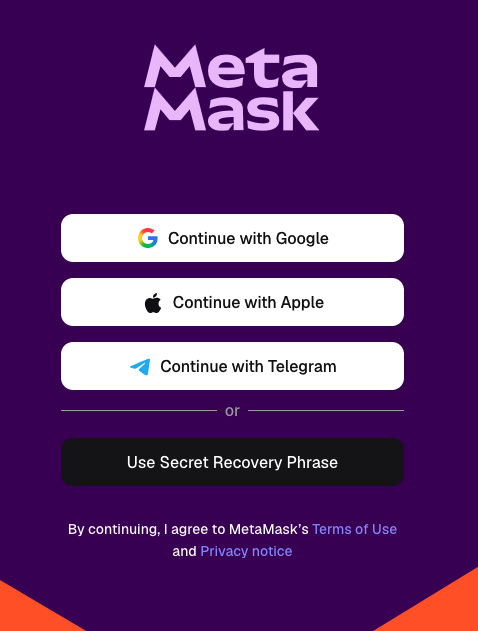
Select "Use Secret Recovery Phrase" (versus linking a social account with a password).
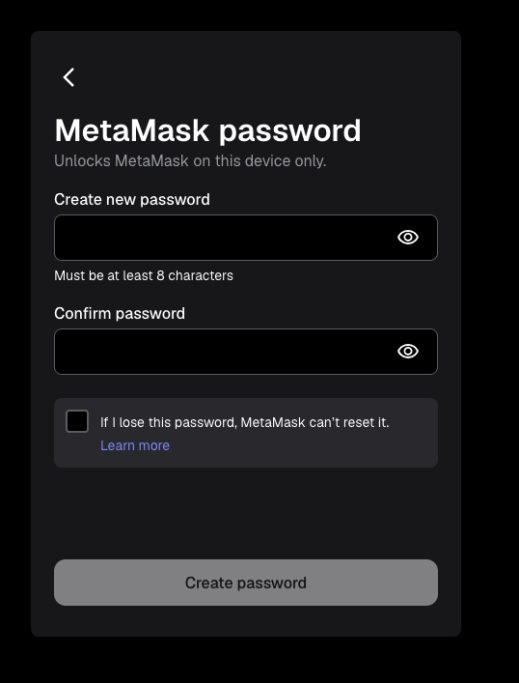
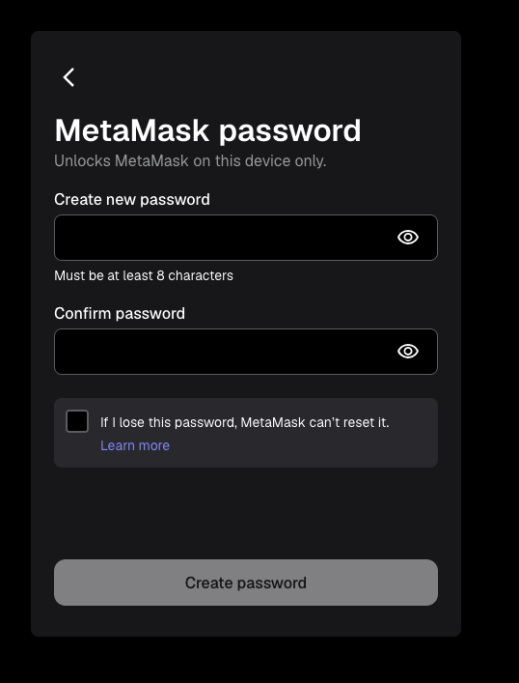
At least 8 characters — this only unlocks MetaMask on this device, it doesn't restore your wallet elsewhere.
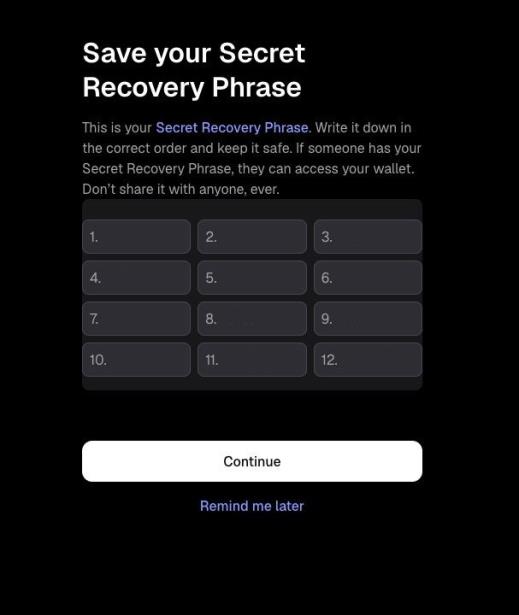
Write the 12 words down on paper, in order, somewhere private and safe. Re-enter them to confirm, then continue.
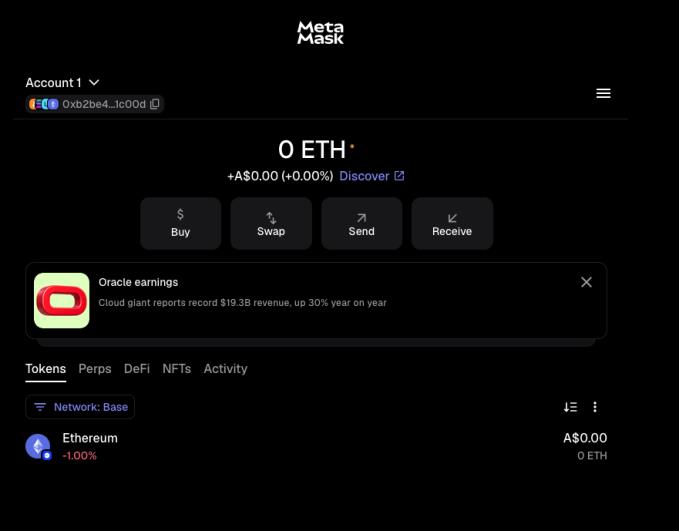
Once confirmed, your new wallet is created and you'll land on the main wallet screen.
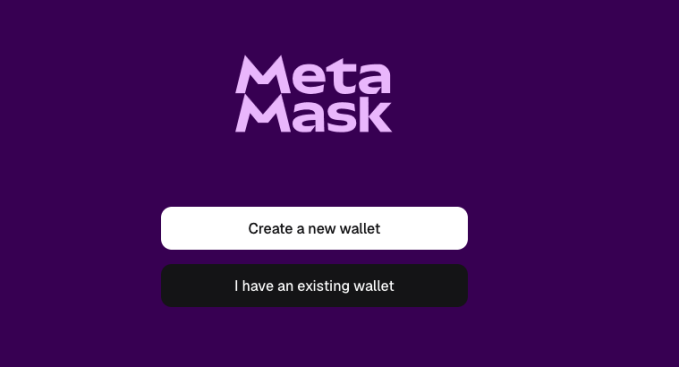
On the welcome screen, select the second option.
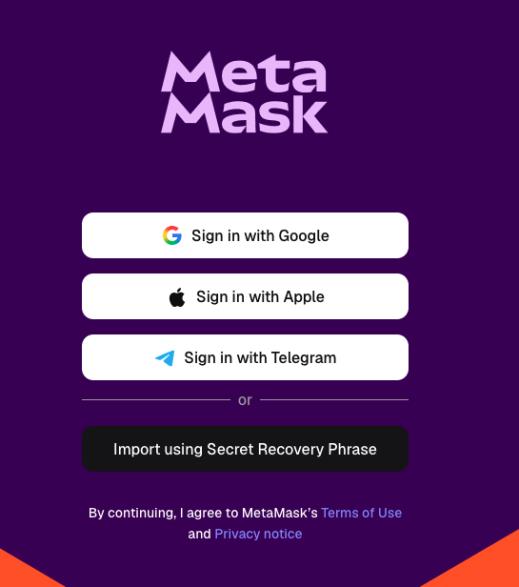
You'll see sign-in options for Google, Apple, or Telegram, plus the option to import directly with your SRP.
Type the 12 (or 24) words in exact order. A single wrong word imports a different — or empty — wallet.
As with a new wallet, this password only unlocks MetaMask on this browser/device.
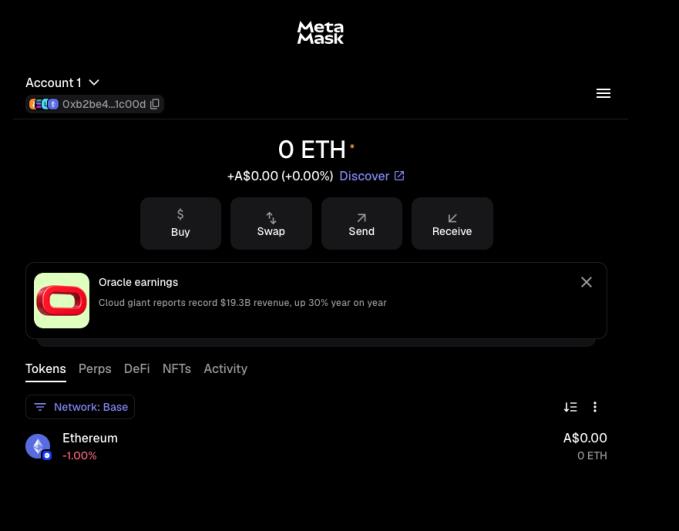
MetaMask restores your accounts, and you'll land on your wallet screen with your existing balances visible.
Which option do I pick?
| Situation | Welcome screen | Next screen |
|---|---|---|
| Never used MetaMask before | Create a new wallet | Use Secret Recovery Phrase (or social login) |
| Already have a wallet / SRP | I have an existing wallet | Import using Secret Recovery Phrase (or matching social login) |
Security reminders
Gas fees: creating or importing a wallet is free. Once set up, you'll pay gas fees (in the network's native token) for transactions like sending, swapping, or approving tokens.
Base App
Before you start
What you'll need
0x7ba2aCCC20861F7B0E58C0a97d1Ad94Cc29b3049Open your Opteq wallet and confirm you're logged in to the wallet holding your QOIN balance. You should see your balance and QOIN amount on the dashboard.
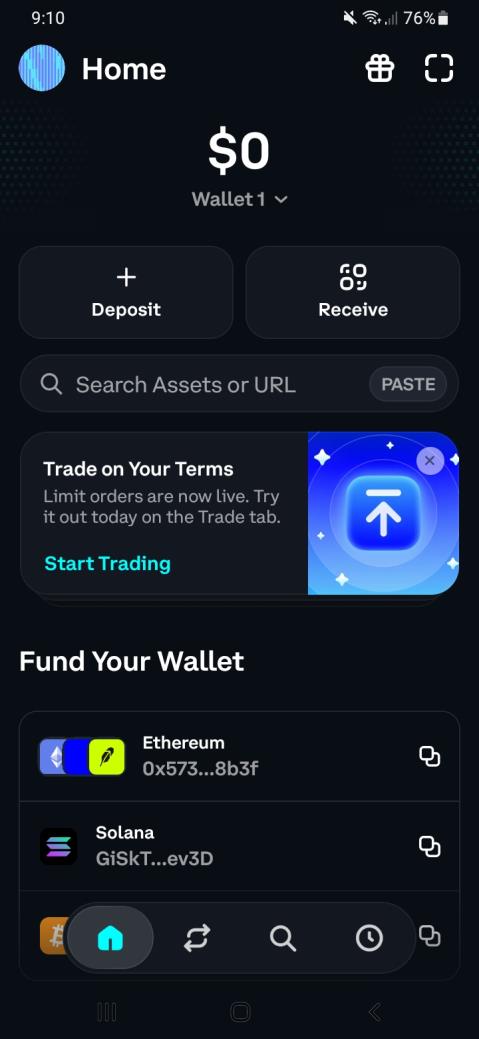
Open the Base app and confirm you're on the Home screen of the wallet you want to receive the QOIN into.
From the Home screen, tap "Receive." This shows your wallet address as text and as a QR code. Tap "Copy Wallet Address" to copy it.
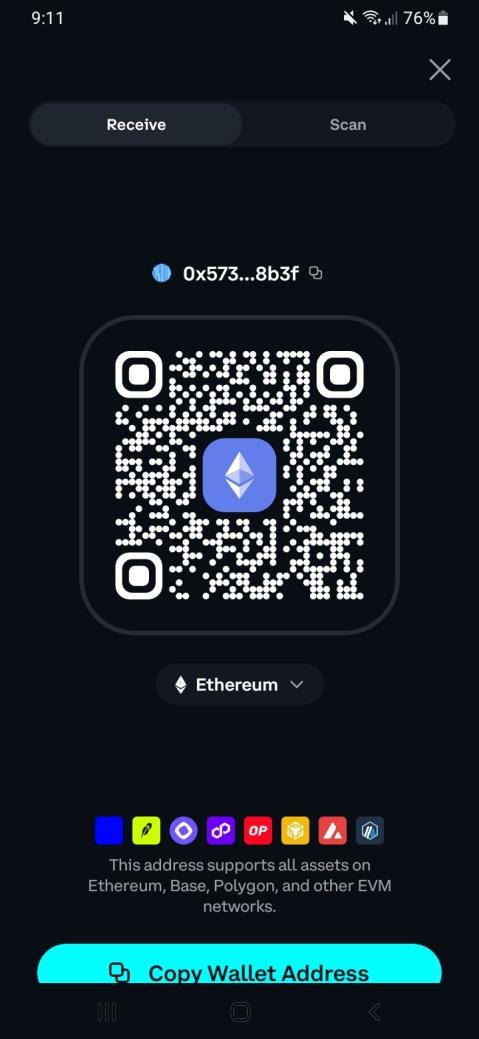
This address supports assets on Ethereum, Base, Polygon, and other EVM networks, so it works for receiving QOIN.
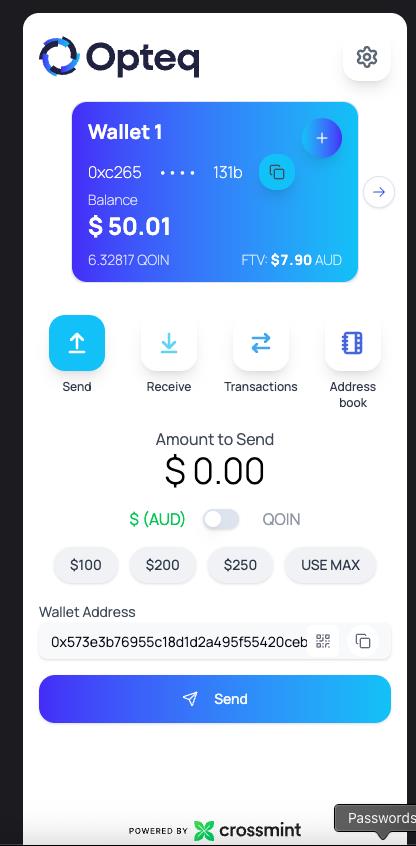
Switch back to Opteq and paste the address into "Wallet Address." Make sure the toggle is set to QOIN (not $ AUD), enter the amount — or tap "USE MAX" — and tap "Send."
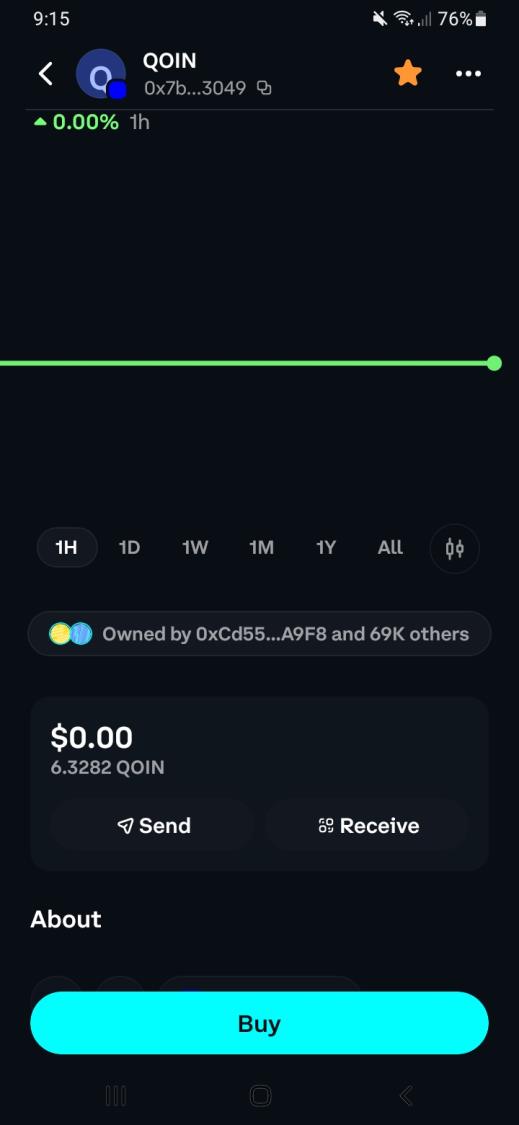
Back in the Base app, tap the search bar and paste in the QOIN contract address to look up the token. Opening it shows your updated balance, confirming the transfer arrived.
Quick reference
| Step | Action |
|---|---|
| 1 | Open Opteq, confirm you're logged in |
| 2 | Open the Base app, confirm you're logged in |
| 3 | Tap Receive in the Base app, copy your wallet address |
| 4 | In Opteq, paste the address, set amount/QOIN toggle, tap Send |
| 5 | In the Base app, search the QOIN contract address to confirm your balance |
Security reminders
Gas fees: sending QOIN from Opteq to the Base app is an on-chain transaction and requires a gas fee, separate from the amount transferred. Gas fees go to the network, not Opteq or Base app, and can't be refunded once submitted.
⚠ Important: Base app flags QOIN as a scam token
When you look up QOIN in Base app, you'll see a red warning banner: "Flagged as a scam — You may lose your funds." This comes from Base app's own automated token screening, not from a third party.
Base app shows this flag for tokens that match patterns commonly associated with scam or fraudulent tokens (copycat names, contracts that block selling, no verified project). It doesn't necessarily mean the token is fraudulent — it means Base app's systems couldn't verify it as safe.
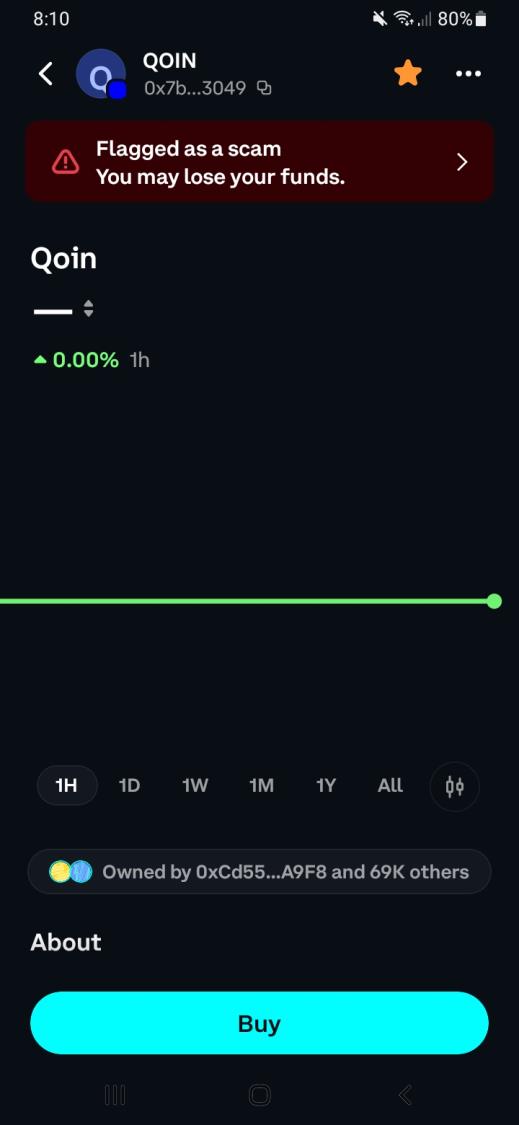
Adding a flagged token to your watchlist only makes it easier to view its price — it does not buy, send, or approve anything. Watchlisting is low-risk, but don't tap "Buy" or send funds to this contract unless you've independently verified the token.
QOIN token details (Base network)
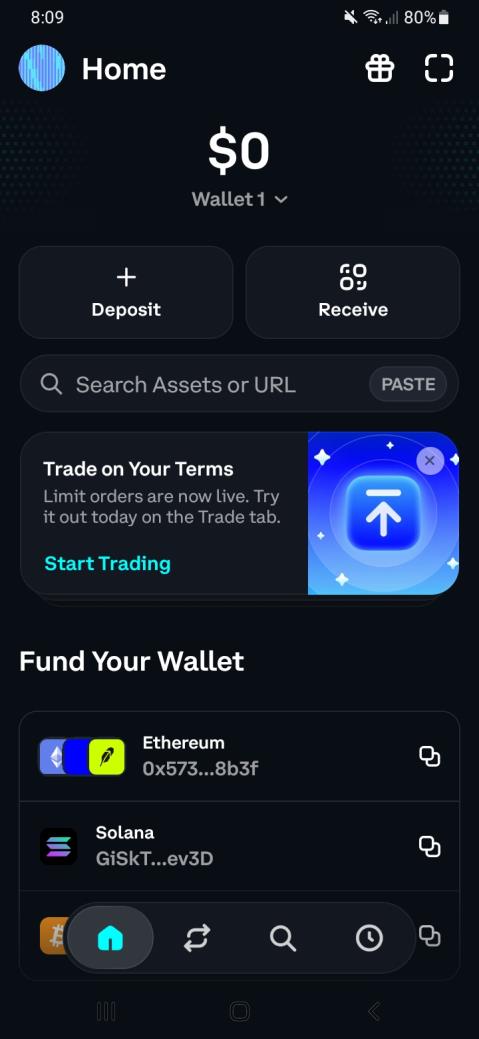
0x7ba2aCCC20861F7B0E58C0a97d1Ad94Cc29b3049From your wallet's Home screen, tap the "Search Assets or URL" bar near the top.
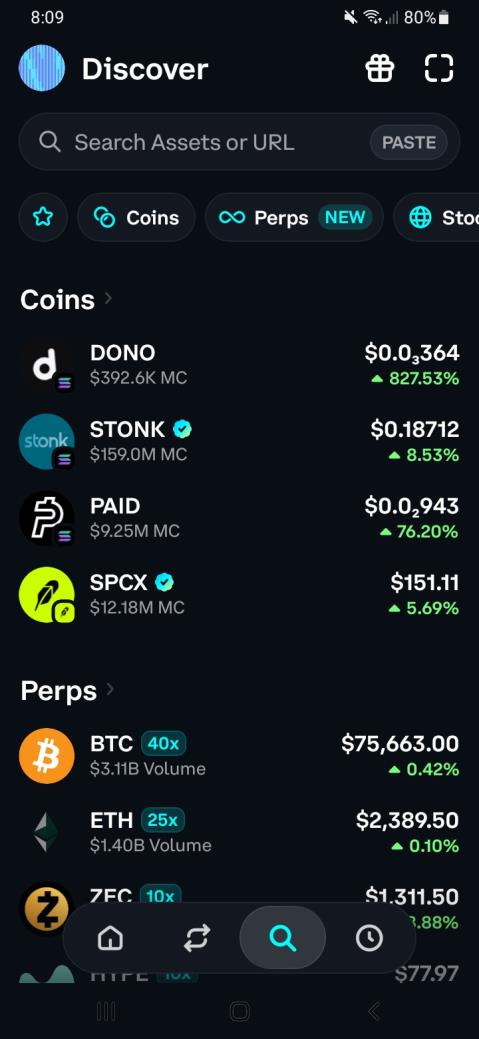
This opens the Discover / search screen. Paste the QOIN contract address into the search field and Base app looks up the matching token.
Selecting the matching result opens the QOIN token page with its price chart and details — including Base app's scam warning banner. Read the callout above before going further.
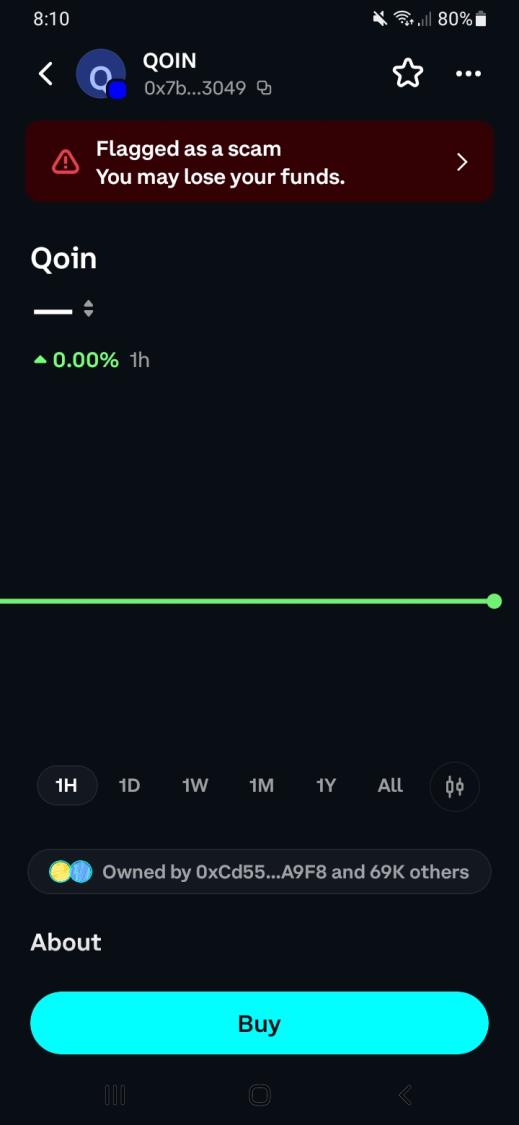
Tap the star icon in the top-right corner of the token page. It fills in and turns orange to confirm QOIN has been added to your watchlist.
Quick reference
| Step | Action |
|---|---|
| 1 | From Home, tap "Search Assets or URL" |
| 2 | Paste the QOIN contract address |
| 3 | Open the QOIN token page from the search result |
| 4 | Tap the star icon (top right) to add it to your watchlist |
Security reminders
Before you start
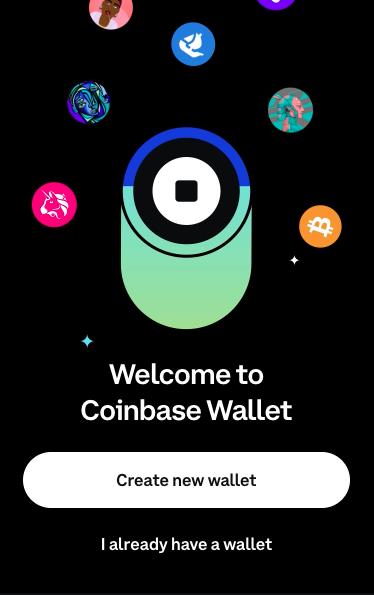
On the welcome screen, select "Create new wallet."
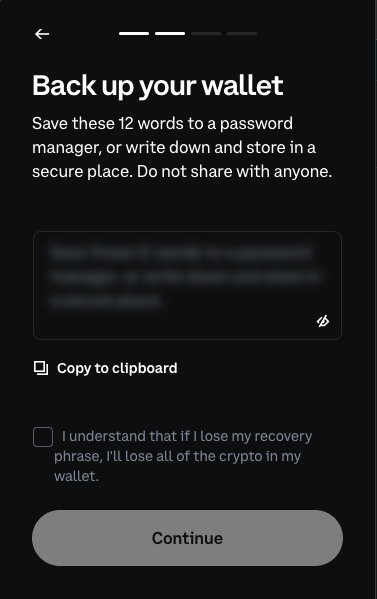
The Base app generates your unique 12-word recovery phrase. Write the words down in order, or save them to a password manager, and store them somewhere private and safe. Tick the acknowledgement box and select "Continue" — you'll then re-enter a few words to confirm you saved it correctly.
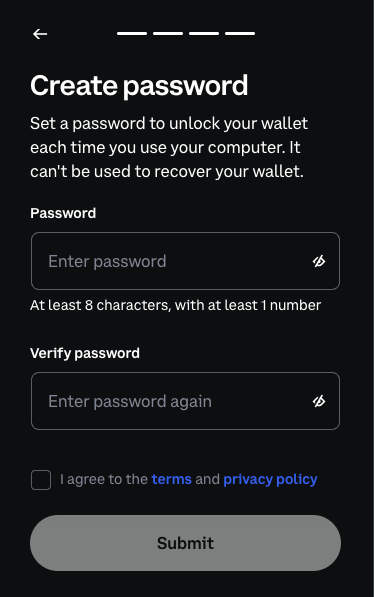
Set a password to unlock the Base app on this device — at least 8 characters with at least 1 number. Confirm it, agree to the terms and privacy policy, and select "Submit."
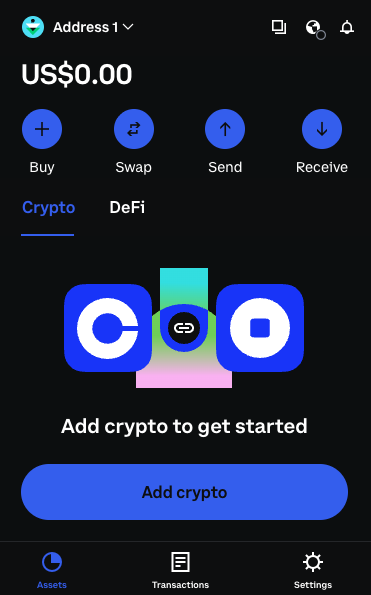
Once submitted, your new Base app wallet is created and you'll land on the main wallet screen with the Buy / Swap / Send / Receive options.
How Base app setup differs from MetaMask
| Step | Base app | MetaMask |
|---|---|---|
| Order of setup | Recovery phrase first, then password | Password first, then recovery phrase |
| Verifying your phrase | Re-enter a few words after backing it up | Re-enter words after setting your password |
Security reminders
Gas fees: creating a wallet is free. Once set up, you'll pay gas fees (in the network's native token, e.g. ETH) for transactions like sending, swapping, or approving tokens — paid to the network, not Base app, and non-refundable once submitted.